






Neal Osborn

Forum Replies Created
-
AuthorPosts
-
Neal Osborn
MemberI got a chance to look at your homepage in more detail Jan.
MemberHello Jan.
MemberThat is the key – playing around with the buttons!
Member:DAwesome 😀
Kick ass perfect tutorial Juan, thanks.
MemberI love the pattern Juan.
MemberGreat pattern Chad.
Member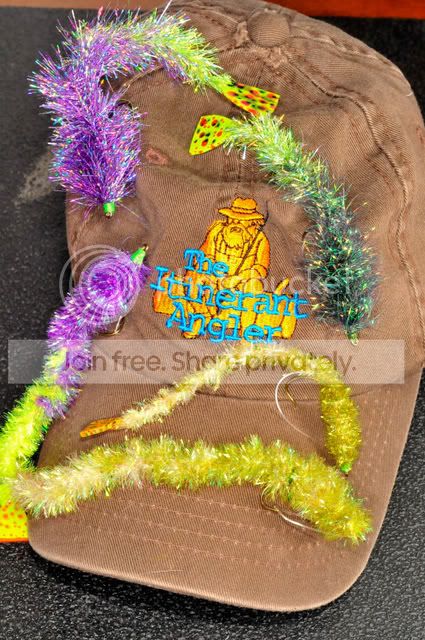 Member
Tim – The best light solution IMHO is the classic Ott lamp http://www.ottlite.com/p-62-classic-task-lamp.aspx.
MemberCloseup – Bugs in Hand
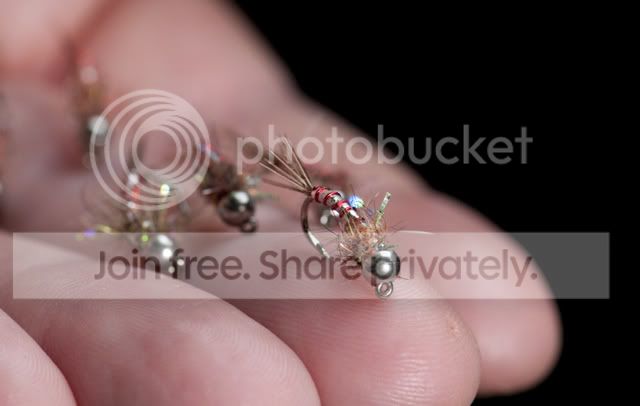 Member
I got your flies right here Tim 😉 Hahahaha.
I will tie a few extra for you.
MemberI used the tutorial from Lauren Williams http://www.flyguysoutfitting.com/zuddler.html early on until I learned to do it my own way.
MemberIf you’re looking for fly tying video’s, there is Fly Tying: The Anglers Art. . .
I’ve downloaded all the video’s in the past and past them on to budding fly tiers to help them along
I downloaded every video on that series when I started tying.
MemberThat is a great article Mike.
MemberZach, your casting skills will certainly serve you well out there. Watching a school of permit come in will send your pulse to 130 in a drop dead second. That’s when my marginal casting skills fall to crap but you will weather it nicely.
BTW, I have always been somewhat intrigued by the cult of personality that goes along with permit fishing. The hard core guys I’ve met certainly have a focused desire to chase this species and they seem to be a different breed themselves. As a reader, I would enjoy a brief blurb or picture that captures that certain something about these fisherman.
MemberI love this shot Cameron (see below). Very nice, everything comes together nicely. It is amazing what we can get from the point-and-shoots. And your comments echo what others are saying – it is common to prefer the point-and-shoots at first because they have much better macro capability compared to the kit lenses on the dSLRs.
Nice fly!
MemberNice choice of vise Cole.
MemberThanks for sharing Kim.
MemberJohn, I can’t leave a question unanswered. Here are a few thoughts for you to ponder to help you in the learning curve.
First image. What do you think about overall “Mood” of the picture? Seems a bit dark and sinister to me. This is a beautiful fly and it wants to be to center of attention – a brighter background might work better. Also, I suspect you were struggling a bit to expose the image in a dark room and probably moving the lights all over during the process. There are two options to help you out; either use a white reflector card or mirror to bring the light back to the front of the fly, or re-shoot during the daytime in a well lit room. Doing the later in combination with a brighter background will produce great results quickly. Also, the composition seems a bit tight, it leaves me wondering what you ended up cropping out of the original image.
Second image. I like this one a lot. Nice blue background contrast to the dark fly. A bit dark but not bad. BTW, “black” anything is always the hardest subject to exposure because black absorbs light. You might want to try spot metering this subject on auto-macro mode if you have that ability. For me black flies are like a street fight, you are going in hitting low, screaming, and spitting, anything to get the shot. You chose a difficult shot for one of your first attempts. Great results, much better than my first attempts at black ants.
Check this out. One of the most important images I can offer. It is published by David Briggs http://www.huevaluechroma.com/index.php. I printed this one out and literally taped it to my studio for about three months. This is art and photography 101. Learn about each topic on the image and then practice as much as it takes until you can not only recognize each of these in your own images but be able to recreate it using a fly in place of the cue ball. Look again at the metal bead head in your first photograph; can you map out these elements on the bead? They are all there – rounded metal on flies is like a microscope in to what the photographer was doing at the time of the shot. Since your bead head is dark with harsh contrasts I guessed that you were struggling a to light up the subject in a dark room and that is why you notice a much more diffused and pleasing bead head if you shoot in the daytime.
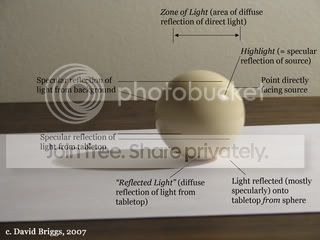
Here are some other webpages to help you get started learning the basics.
http://www.johnlovett.com/test.htm
http://shutterfly.webphotoschool.com/How_Soft_Boxes_Work__Part_I/index.html
http://www.huevaluechroma.com/index.php
http://alzodigital.com/photo_guide/tent_application_guide_white_background.htm
MemberGlad you are getting excited about fly photography John.
I would like to take this opportunity to make a public announcement of sorts. As many of you know I am not a professional photographer and frankly many of the guys on this board can outshoot me in a second. However, my posting behavior is to post a lot pictures with examples. This has led to general excitement for fly tying photography and I have noticed people mentioning my name in the subject heading.
With this in mind, I have created a new blog, http://www.flyartstudio.com. I moved in this direction to funnel the fly tying photography “help-me” posts to one specific location. They are starting to become more frequent on this board and hopefully Zach and the others aren’t getting too frustrated. Currently, I am devoting my time to learning the blog software and populating the site with some introductory articles on things I’ve learned along the way. In the very near future we will have a section where people can post their fly pictures for general comment and critique.
In the meantime, I would like to remind everyone that this is a great community full of professional photographers willing to openly share their knowledge. I am just a pea in a pod so to speak.
Sorry about dodging your initial question John. Please feel free to email me at nealpod@mac.com and I would be happy to help you out personally. BTW, thanks for the kind words about my posts and tutorials. I miss teaching since I left academics and enjoy sharing what I’ve learned along the way. It’s nice to know people are noticing.
Best,
NealMemberGreat shots Cameron! I got your email and pictures, thanks. The originals are great on my computer and I love your PVC box setup. You are going to have a blast with this studio. Since you posted a montage of the pictures here I thought it would be appropriate to comment on this post.
I am not a professional photographer . . . but, as you know, I have spent a crazy amount of time on this particular subject of fly photography. Here are some of my thoughts based on my own trials and tribulations.
Again, strong work.
First off, why did you shoot these with the Pentax W20 instead of the Nikon D70? Seriously, the D70 is a far superior camera and these flies deserve the best equipment available. Let’s discuss that below.
Looking at the 10 C’s . . .
Commitment – you are documenting other’s work for your blog. I like what you have done, simple shots of the flies themselves with a clean background; nothing artsy. You want the flies to stand out on their own and you did a good job.
Composition/Color – Here I have some concerns. First, IMHO the flies should all face the same direction, either head-right or head-left. I am a bit distracted by having to readjust my eyes when you change composition. It would be easier to compare the flies as apples-to-apples. Second, Your background hue/saturation changes between shots from light-to-dark grey. That is a function of your camera’s metering and distance of the subject from the camera. I suspect you kept the vise at a fixed distance from the background but moved the camera closer/further from the subject on an individual basis, thus changing the dynamic of the background. You might instead consider keeping the camera at a fixed distance from the background but moving the vise to gain composition; in doing so you will retain a uniform background color and that will allow the viewer to again compare apples-to-apples. Third, you have different %’s of the vise head in each shot, try to get the same amount in each picture for clarity.
Light – I’m sure others can better comment on your hot light setup if you tell us what you have employed. One trick is to use a white card or reflector to bounce the light off the base back up to fly to give better highlights. I posted a brief how-to on this topic on Fly Art this weekend. By simply bringing a bit of light back to the front of the fly you will be able to better separate the subject from the background and give a “glow” or keylight effect to the fly. Also, I think you need an extra light on that background to brighten things up. BTW, nice white balance. Was that auto WB straight from the camera or did you apply a theme WB?
*Note* these changes are much better employed with the D70. Use a tripod if available.
Conversation – nicely done. This is clearly a montage of submitted contest pictures.
Coverage (depth of field) – With the Pentax W20 all pictures were taken at FL 6.3mm, f3.3, and between 1/50-1/80s. They look great for a point-and-shoot and honestly I am constantly amazed at the wonderful results we can get from these cameras. However, you can do much better with the D70. Try f11 with the D70 mounted on a tripod and you will be laughing at the striking difference.
Convergence/focus – The pictures are a bit soft. But then again, the D70 will make them shine.
Contemplation – The finishing move. Did you do justice to the fly tier’s art? Do they make you say Wow? I think they do and I certainly want one of each in my fly box!
I hope you find these comments helpful. Again, I am pointing out things that have helped me to overcome my own photographic challenges. I love what you are doing and it is great to see people out there making fly art. Cheers.
-
AuthorPosts