


Mini Hopper Juan
- This topic has 34 replies, 19 voices, and was last updated Jul 22, 2009 at 2:54 am by
chad copsy.
-
AuthorPosts
-
Mar 5, 2009 at 8:03 pm #6555
Juan Ramirez
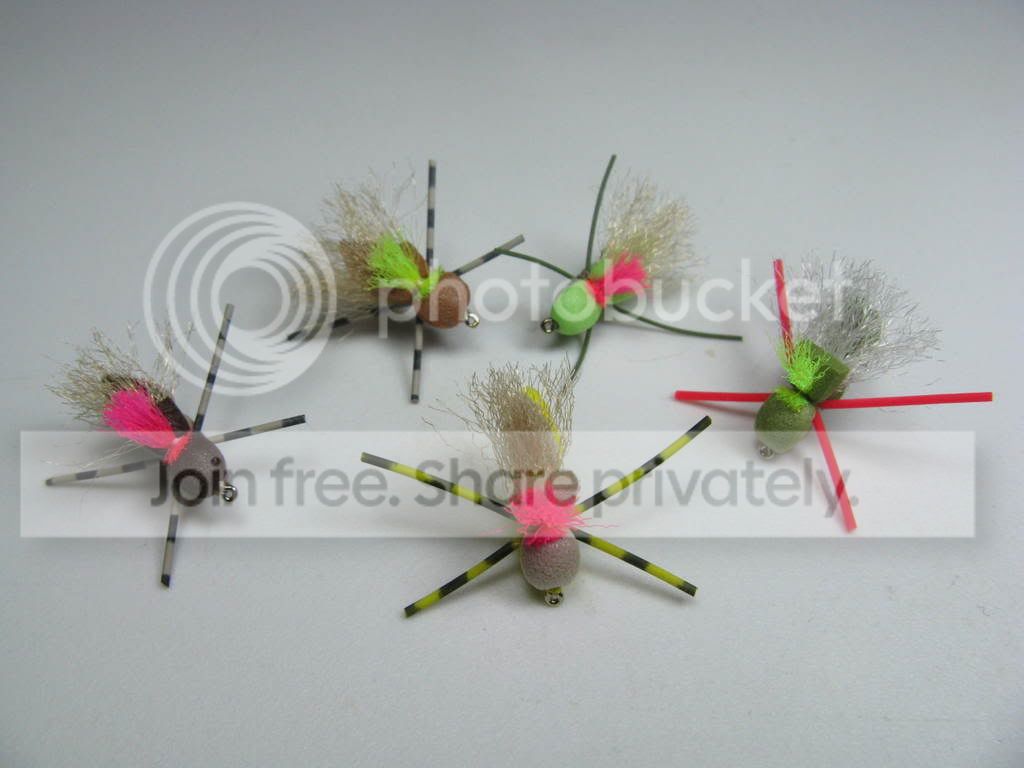
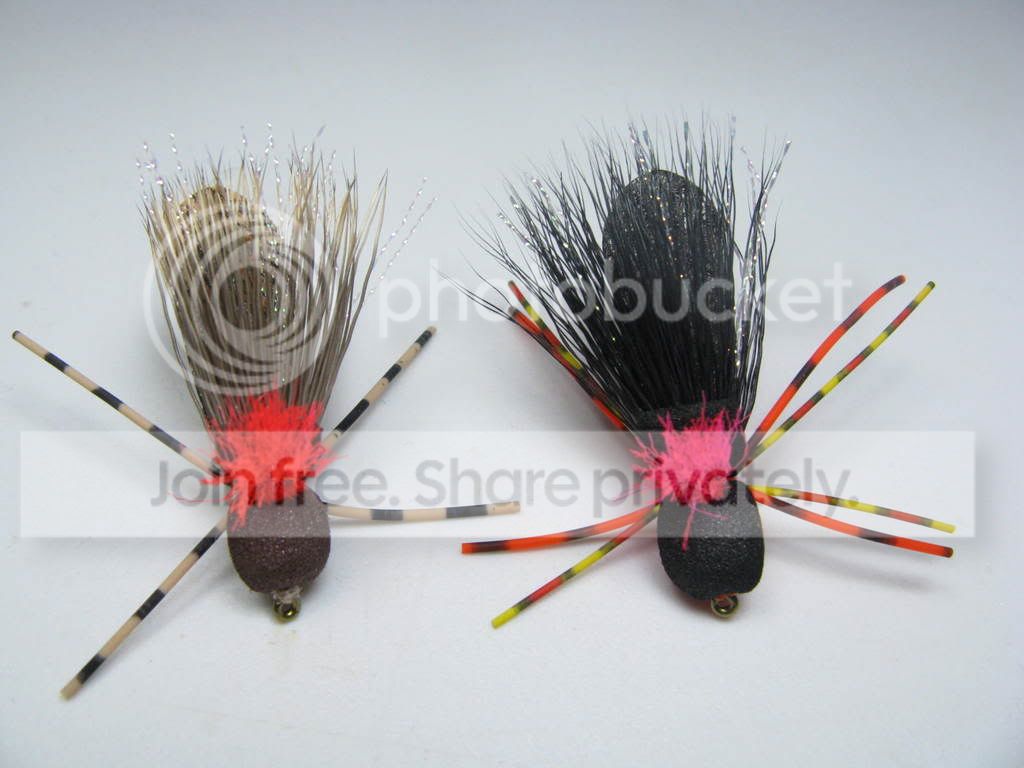
MemberHere are a couple of pics of a fly that I was playing around with last night. It’s a mini version of my Hopper Juan. It is on a #14 dry fly hook.
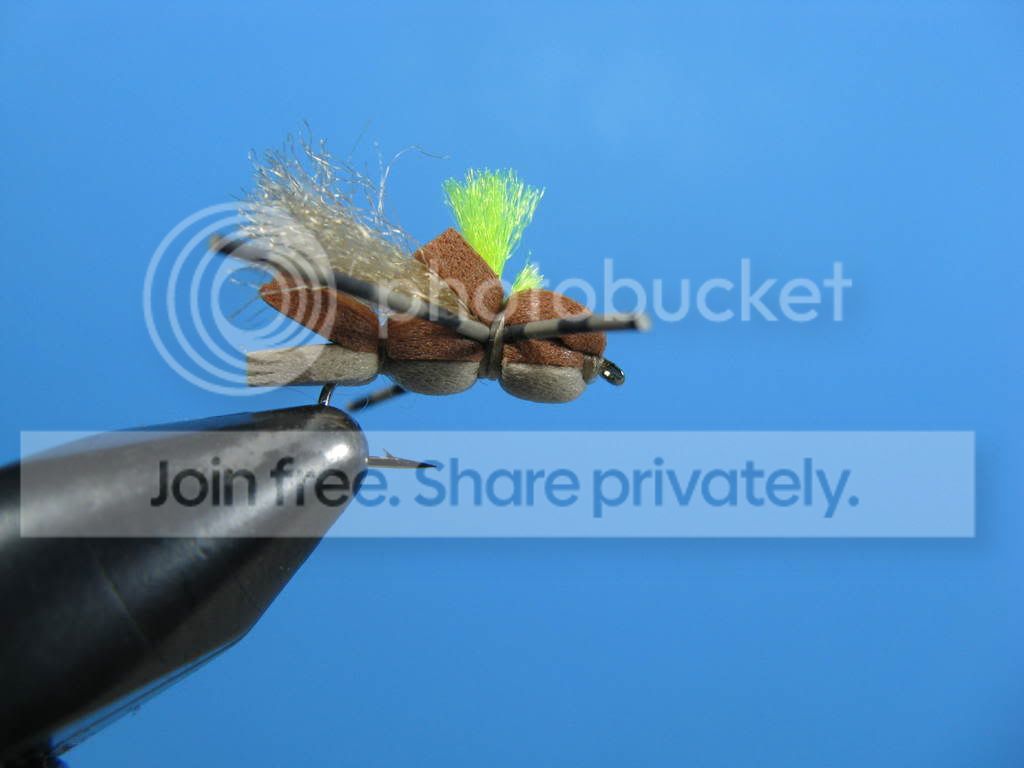
Juan
Mar 5, 2009 at 8:30 pm #57493dusty montgomery
MemberNice bugs, Juan.
I would be interested to know how you punched out the foam and got such round corners and sides. What do you personally fish for when using these?D.
Mar 5, 2009 at 9:11 pm #57494MemberNice bugs, Juan.
I would be interested to know how you punched out the foam and got such round corners and sides. What do you personally fish for when using these?D.
Dusty,
I tie a regular size hopper in size 6-10 that I call the Hopper Juan. This was just something I tied while wondering how I could downsize the current version and have a still usable pattern with out crowding the hook gap. I didn’t use any special cutters on this foam as I do with the bigger version. They are simply foam strips cut about 1/4″ wide. I did stretch the foam to thin it and make it thinner over all. The round corners and sides just come as you tie this fly. That’s what I love about the look of this fly. It is clean, without much thread showing. You have to use the correct sized foam and make sure it’s not too wide. It’s really a pretty easy fly to tie. I used MFC’s widow web for the wing. I found all of the material lying around on my desk and put it together. I haven’t fished this pattern yet, but I will. I have fished the bigger Hopper Juan for a few years now and I am pleased with its performance. There is no doubt that this will be a fun bug on the smaller creeks and smaller fish here in the Rockies as well as out East. Just think, a 2 or 3 wt, with a box of these and some beadheads!!!
Juan
Mar 5, 2009 at 9:30 pm #57495 Tim AngeliMember
I really like that fly. It’s simple and yet very realistic. Reminds me a lot of Charlie Craven’s Charlie Boy Hopper except I think I like yours better. Nice pattern!
-Tim
Mar 5, 2009 at 10:04 pm #57496MemberTim,
Thanks, and I agree with you about liking it better than Charlie’s. Greg Garcia said the same thing. That makes me feel good. I worked a long time on this pattern and one day, it just clicked. I wanted a good, clean, durable foam fly that could hold up a small dog, catch fish and was hi-vis for the older generation. Oh, yea, I wanted to be able to call it my own. I haven’t seen anything out there like this yet. If I remember, I will post a picture of the original Hopper Juan when I get a chance. Look for some of my flies in the future at Herman’s site. If you haven’t seen it yet, check it out. http://www.flytyingclips.com/
Mar 5, 2009 at 10:14 pm #57497MemberI agree with you both! I tried tying some of the Charlie Boys, but mine did not come out like in Fly Tyer magazine. This one does look more simple to tie.
Can we expect a tutorial for this new bug?
Nice work!
D.Mar 5, 2009 at 10:58 pm #57498cole m.
MemberLooks fantastic! I would love to see a tutorial!
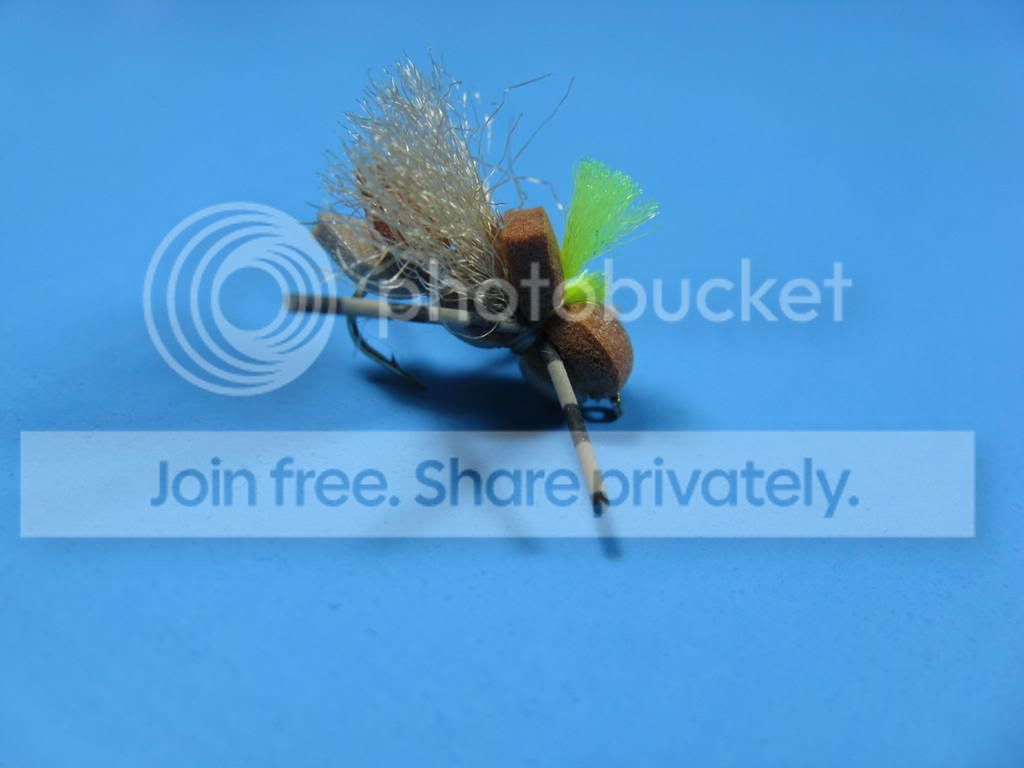
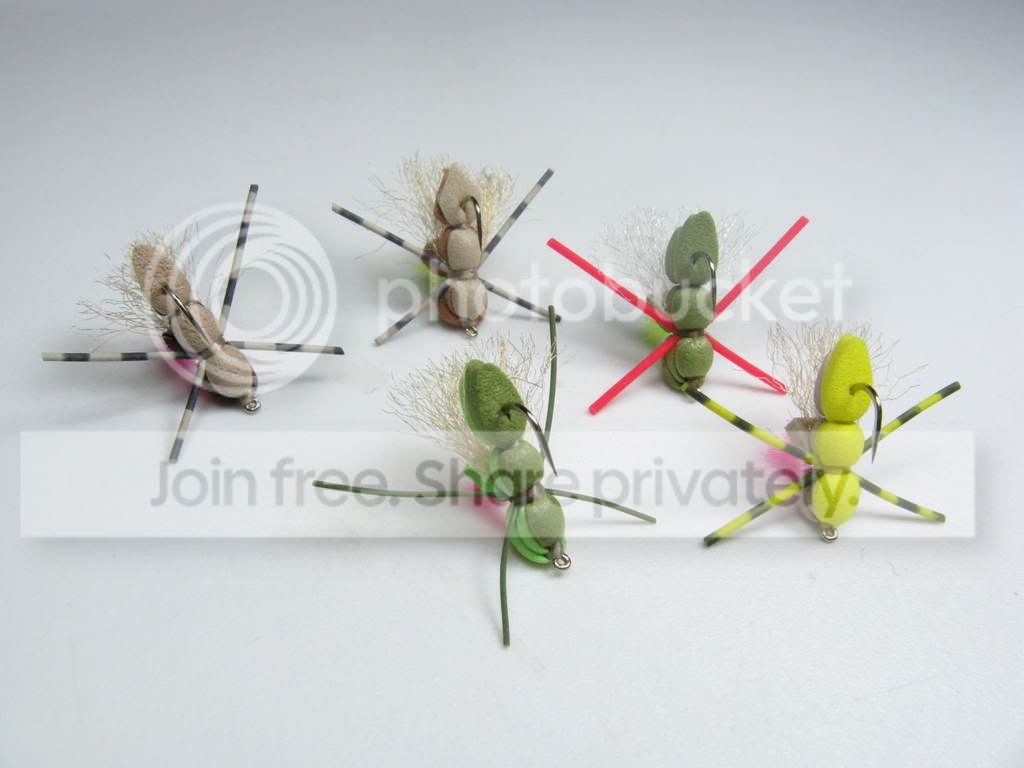
Mar 6, 2009 at 4:39 am #57499MemberHere are some more pictures of the minis and also some of the original Hopper Juan’s. 🙂
 Mar 6, 2009 at 6:07 am #57500Member
Great Fly!
Mar 6, 2009 at 9:43 am #57501Tim AngeliMemberJuan,
I agree; great pattern for everything from a salmonfly to an august hopper! I’ll take 2 dozen. 😉
What do you use for the wing material in the newer version? MFC Widow Web? What exactly is that? It looks really good and easier to incorporate than the deer hair.
-Tim
Mar 6, 2009 at 11:50 am #57502keith b
MemberI like this pattern a lot!
Can you get a SxS posted for us, along with a material list?
ThanksMar 6, 2009 at 1:40 pm #57503Neal Osborn
MemberI love the pattern Juan.
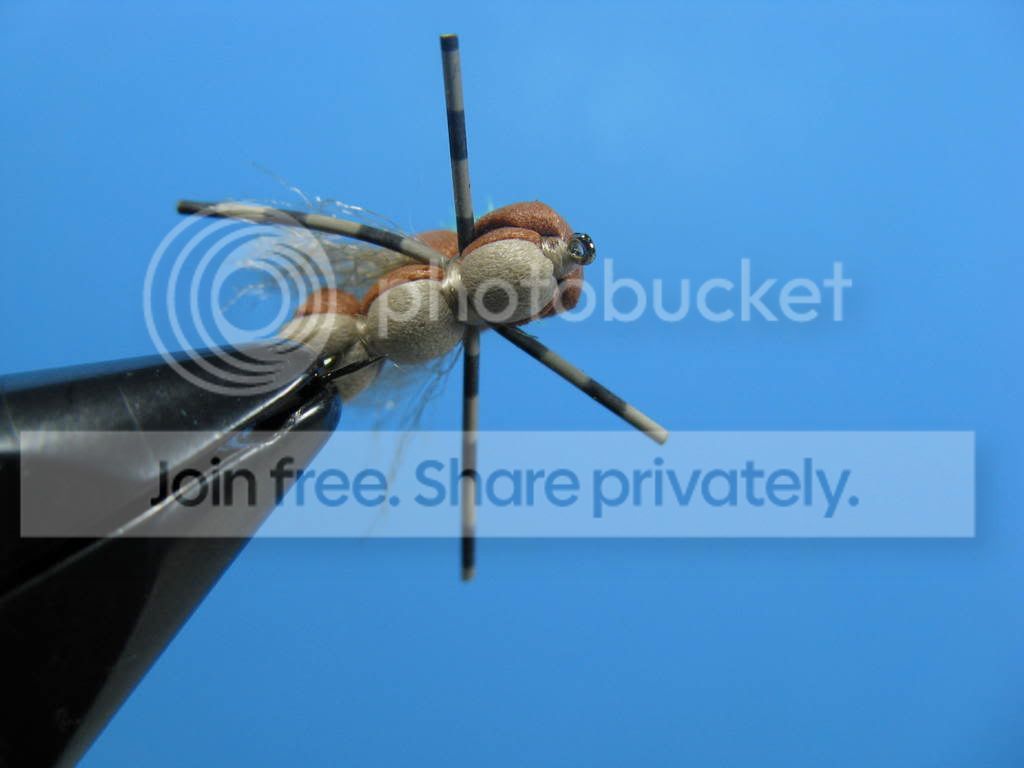
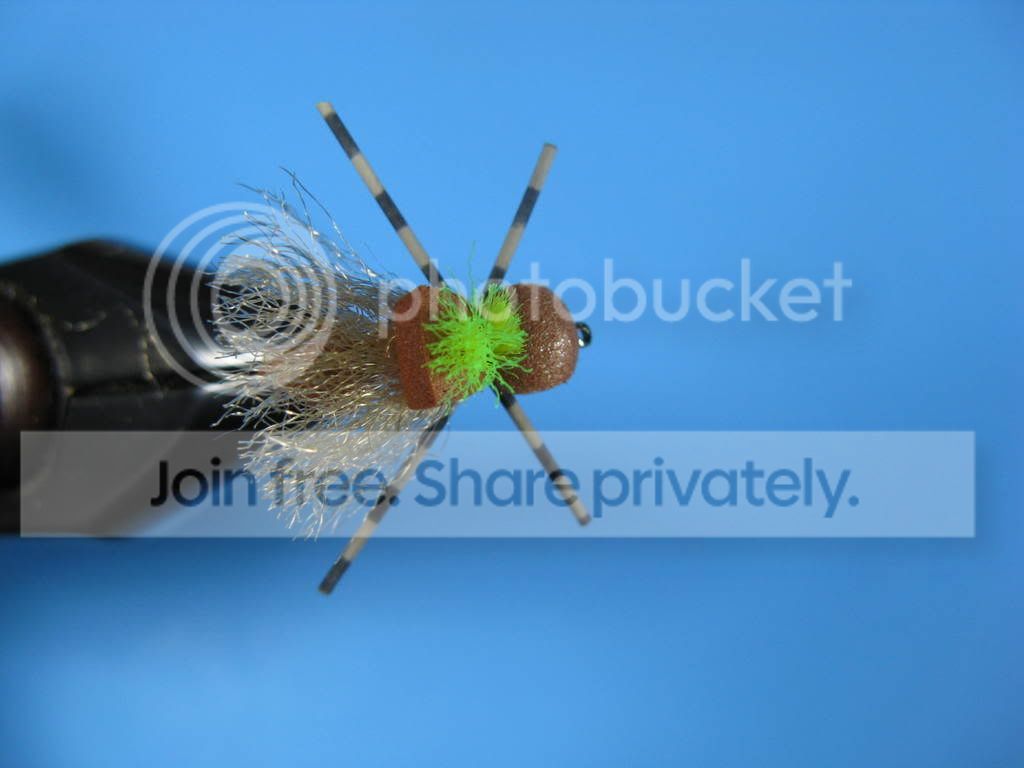
Mar 6, 2009 at 1:58 pm #57504Rob Snowhite
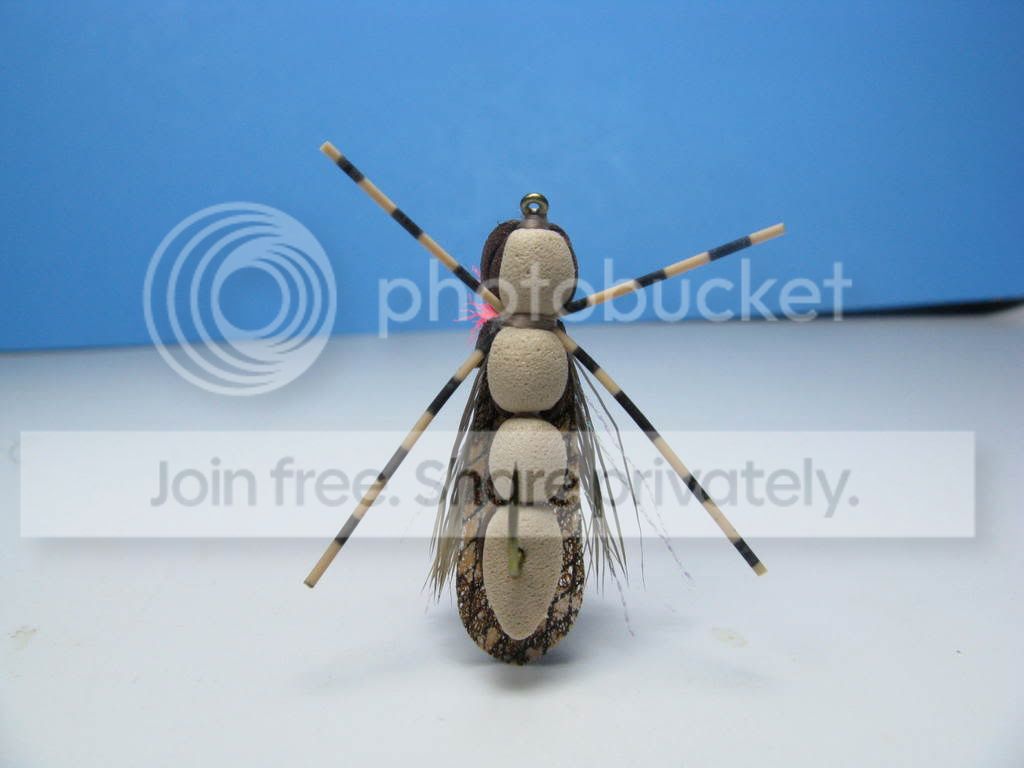
Memberventral view, the one that really matters, the one the fish sees. thanks for including those
Mar 6, 2009 at 6:23 pm #57505Member
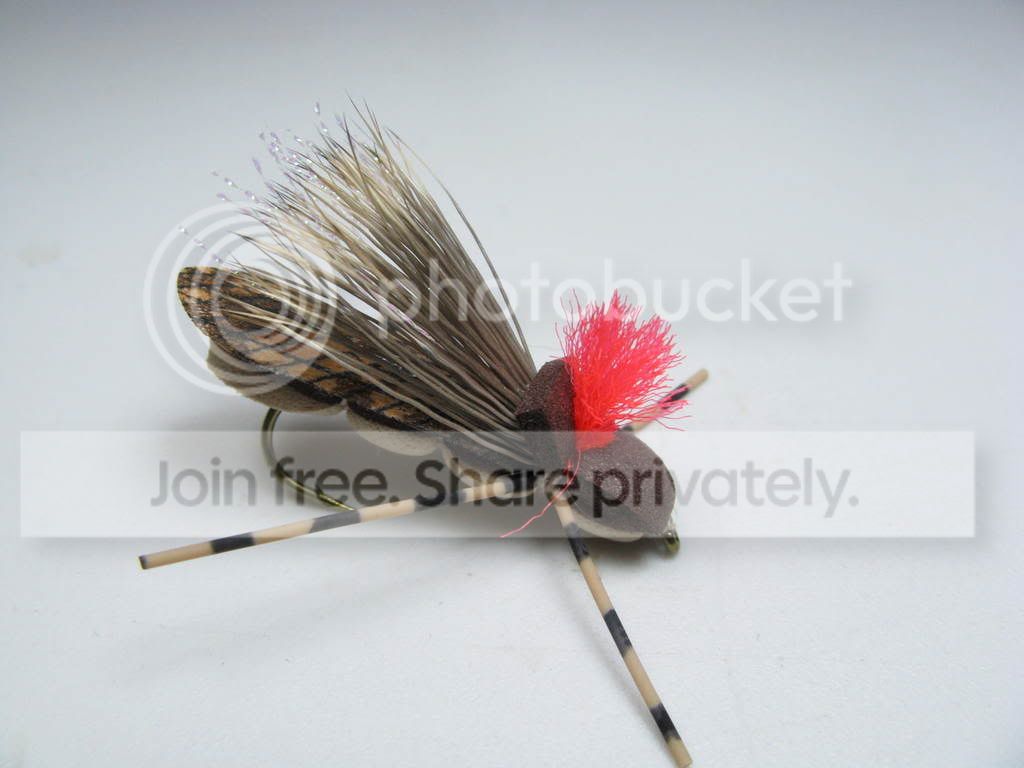
Original Hopper Juan
Hook: 2XL such as TMC 5262 or MFC 7026 size 6-10
Thread: UTC 140 denier to match foam
Foam: 2mm foam, cut to shape with chernobyl taper cutter.
Glue: Krazy glue with brush
Underwing: MFC wing material, brown, cut with wing cutter.
Wing: Nature’s Spirit early season cow elk
Flash: Krystal flash, pearl or U.V. pearl
Legs; Med. rubber legs, color to match body
High-Vis: MFC Gator Hair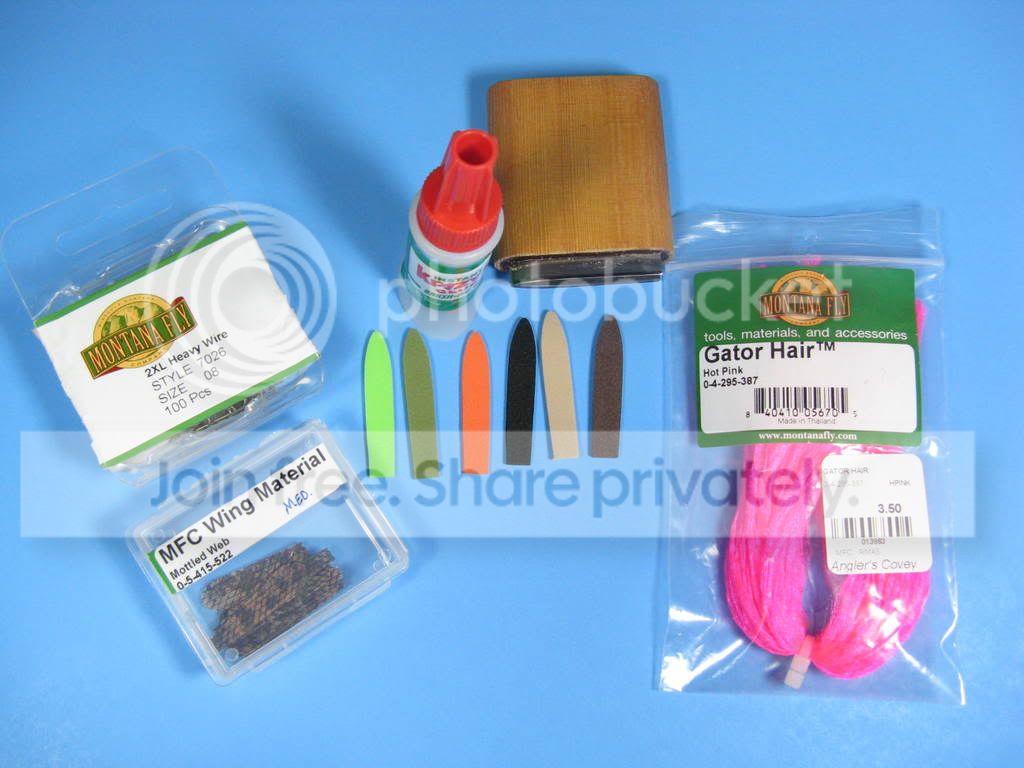
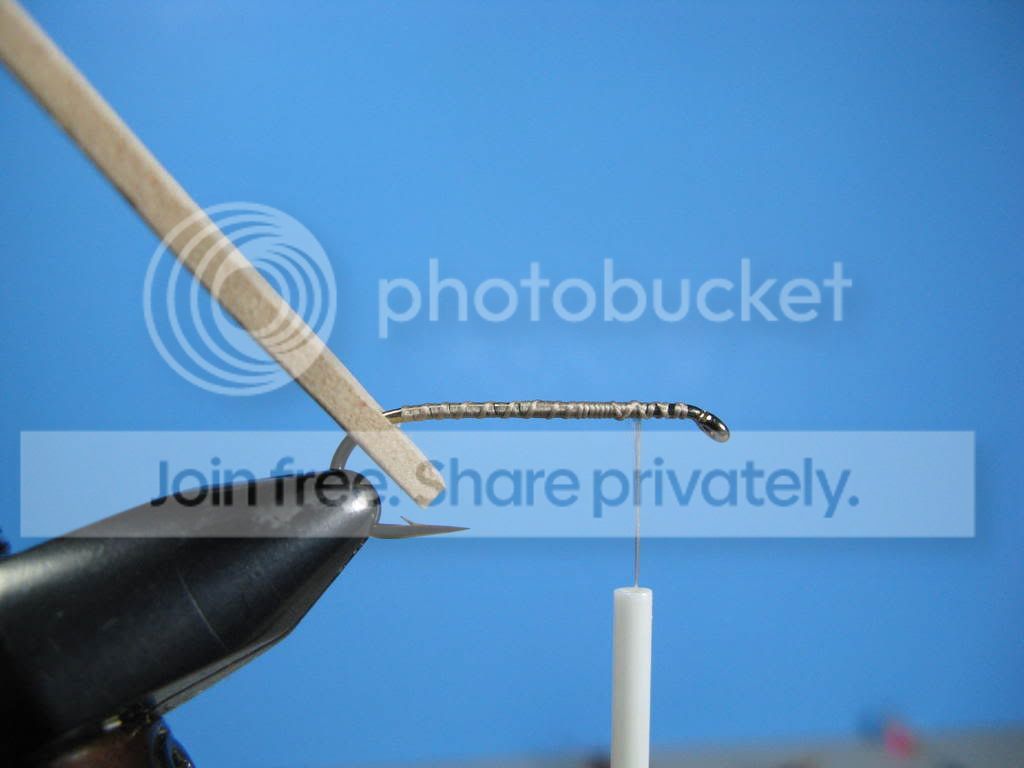
Start by making a layer of thread on the hook. Measure the hook gap and pierce through the bottom piece of foam.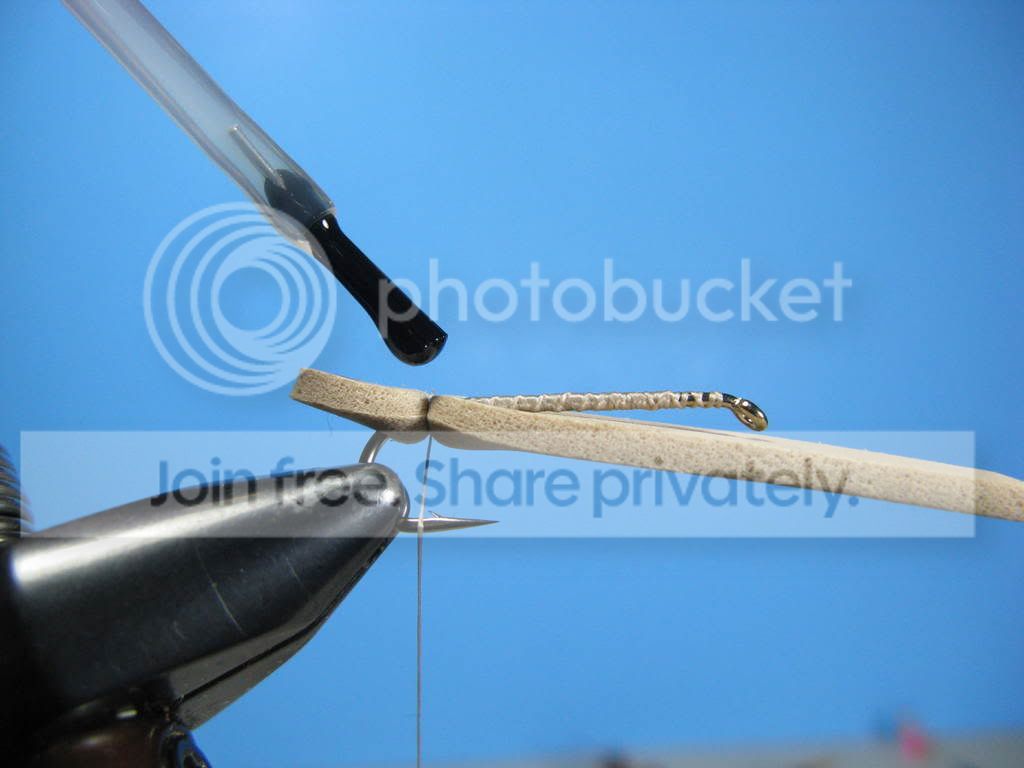
Position bottom piece of foam and make three wraps to secure. Place a small dab of crazy glue on to hold to hook shank.
Lay top piece of foam in position. Make three wraps to secure. The glue will help hold it together.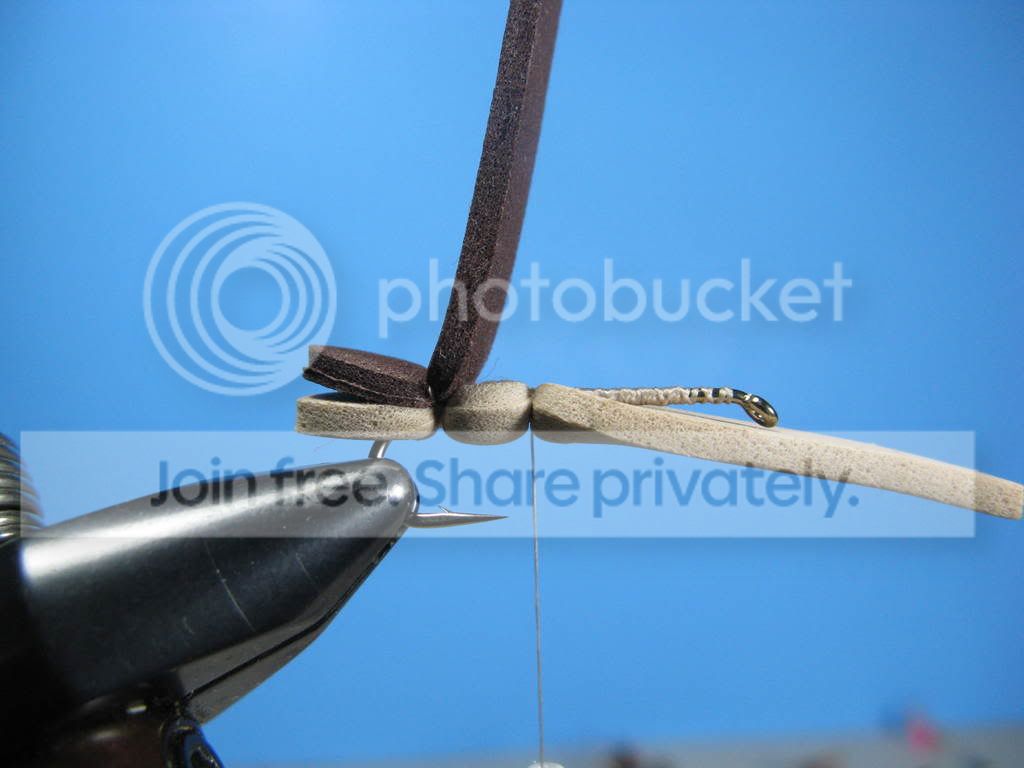
Make thread wraps to next segment point and tie down bottom piece of foam. Place a small amount of glue to hook shank and foam.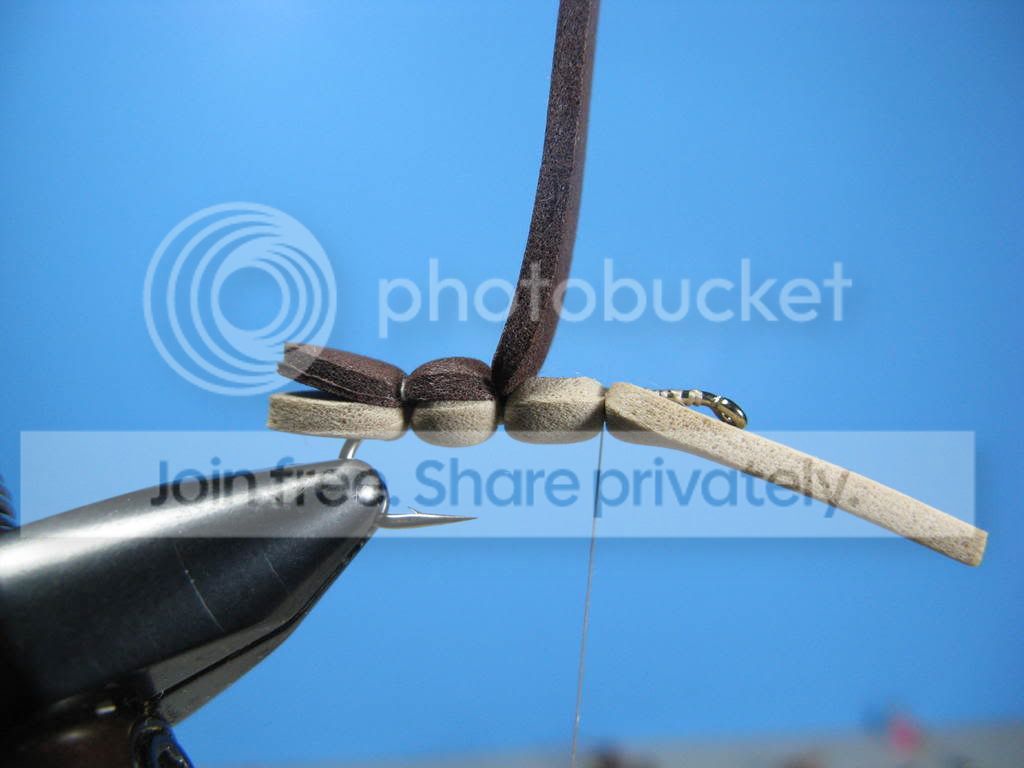
Continue to make segments using just a dab of glue on each segment. At this segment will be all your hair and additional wraps to finish the fly so don’t overdue it here. Only make enough wraps to secure the foam. The glue will help hold it together.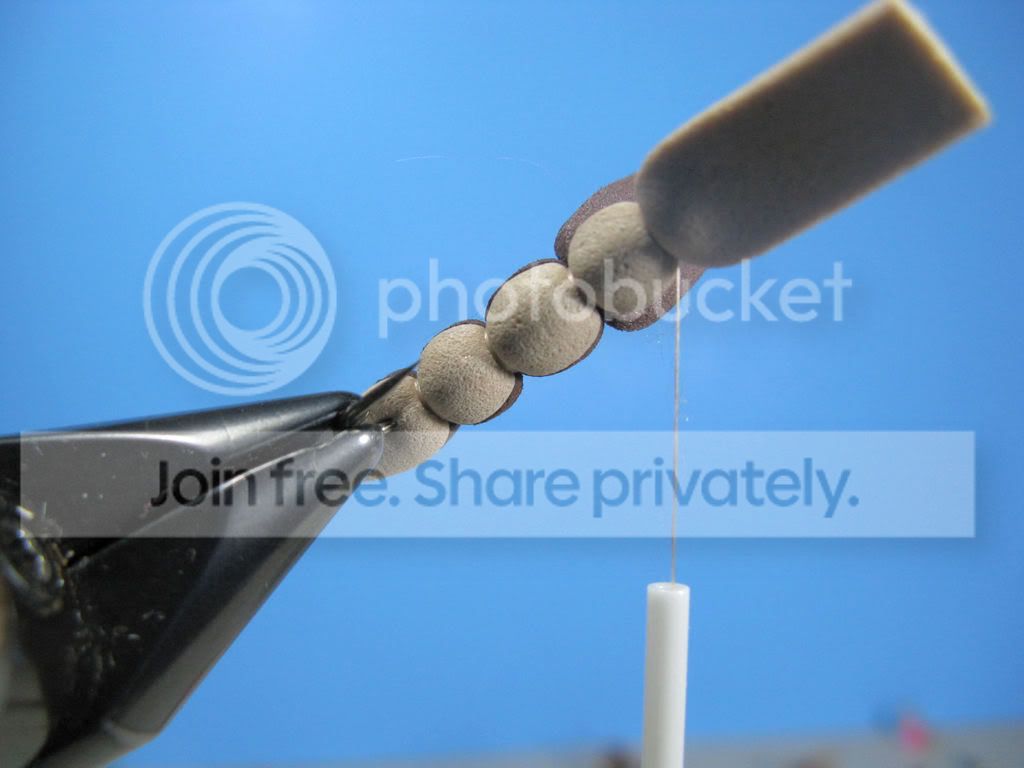
Make last segment and leave a little room to make a cut and to be able to cover foam with thread.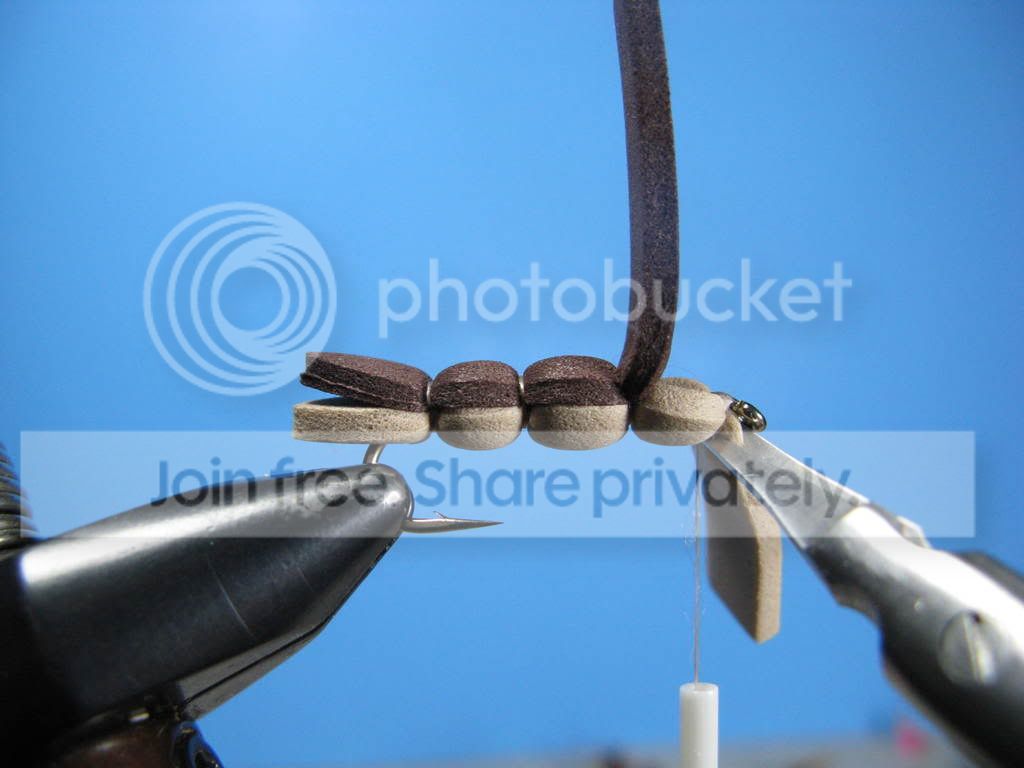
It is very important that you have mirco tip scissors to make a clean, close cut. You will end up with some little “nubs” that you will have to trim and then cover with thread warps to make a clean head.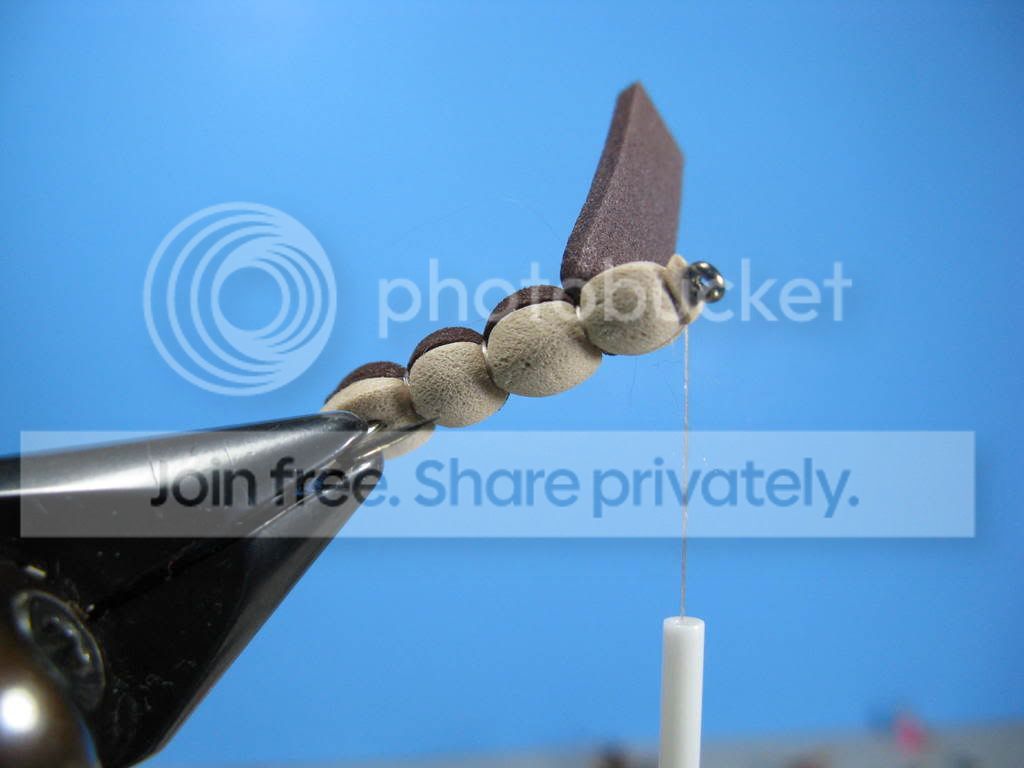
At this point, I have covered the “nubs” under thread wraps. Notice my frayed thread? This is the only disadvantage of using UTC thread. It important to use UTC 140 though.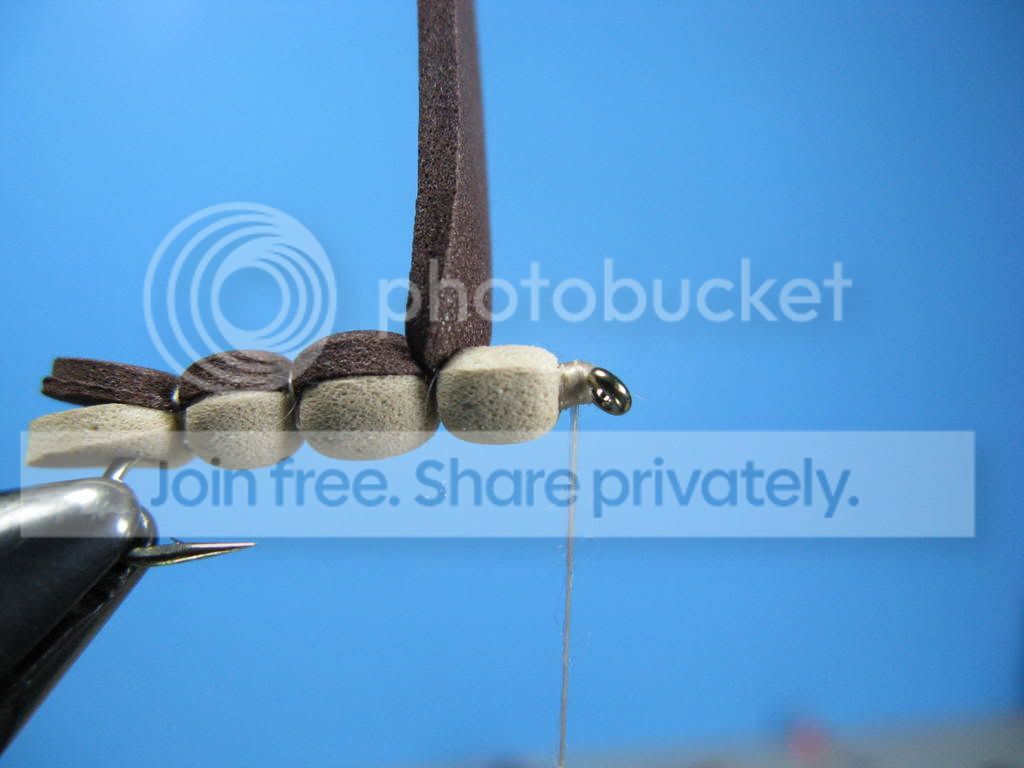 Mar 6, 2009 at 7:26 pm #57506Member
:DAwesome 😀
Kick ass perfect tutorial Juan, thanks.
Mar 6, 2009 at 7:53 pm #57507MemberAwesome tutorial Juan! Thank you very much.
DustyMar 6, 2009 at 10:56 pm #57508bill heffner
MemberThanks for the great tutorial!! 😀
Mar 6, 2009 at 11:29 pm #57509Member:DAwesome 😀
Kick ass perfect tutorial Juan, thanks.
And you did all that with a Canon Powershot A720! Wonderful pictures from a point-and-shoot.
Great! I don’t even know what the hell I am doing with the photos. I just try to mess with the settings a bit and something about the f stop and something else. Hell, I don’t know. Glad it made the cut though. 😮
Mar 7, 2009 at 12:42 am #57510MemberThat is the key – playing around with the buttons!
Mar 7, 2009 at 2:00 am #57511MemberAwesome tut!!! Thank you!
-
AuthorPosts
- You must be logged in to reply to this topic.