


Project Boat
Blog › Forums › Fly Fishing › Project Boat
- This topic has 202 replies, 1 voice, and was last updated Jul 6, 2020 at 7:56 pm by
Zach Matthews.
-
AuthorPosts
-
May 1, 2009 at 1:06 pm #48542
Josh England
MemberStay away from ETHANOL fuel — Ethanol fuel in or around water will cut your engine life SIGNIFICANTLY.
It’s getting hard to find non-10% ethanol up here in Atlanta, I’ve switched over to 10micron filter and am running ringfree and yamalube ethanol stabilizer. I have not had any issues so far, other then it cutting out a little last night, hope this is not the start of a problem.
Andrew, It’s a good idea to keep your gas tank as full as possible, and keep it sealed up good, the less humid air moving in and out of your tank the better.
May 1, 2009 at 1:11 pm #48543Andrew Wright
MemberOn a side note, if any of you are curious about the registration process, it has turned out to be a little bit difficult.
Step 1. I registered the boat on the DNR’s website and learned that the boat has not been registered since 2002 and the prior registration was not in the name of the person I bought it from. This being the case, the boat registration is on temporary hold until I can get a notarized affidavit from the individual that I bought the boat from detailing how he got the boat and his reasoning for not having it registered.
Step 2. Anticipating that this could be somewhat challenging, I called the DNR to see what could be done in the event that said affidavit could not be acquired. They said that I could send the previous owner a certified letter requesting the information and if he did not respond that they would accept a copy of the letter and the delivery confirmation as proof that I had tried. Kind of a pain but really not a huge deal.
Step 3. I went to the tag office to get a new plate for my trailer and hit another roadblock. They informed me that I would have to have a police officer verify the trailer VIN number before the boat could be registered. So, when I got home last night, I hooked the boat up and trailered it to the police station to have it verified. At this point it had become painfully obvious that the means by which the previous owner had acquired this boat were unclear and potentially questionable. Needless to say, I was slightly relieved when the officer called in the number and it had not been reported stolen.
Step 4. I will have to head back up to the tag office and pay an $18 fee for a new trailer tag. I might be able to make it by there today, but the boat registration will likely take another week to sort out.
I am sure that registering a new boat and trailer, or for that matter, a used boat that had a current registration would have been much simpler. But like everything else on this project, this has been a learning experience.
May 1, 2009 at 1:24 pm #48544The Itinerant AnglerIf you need affidavits prepped, I can do that, and I might be able to sweet talk one of the ladies here into coming to get it notarized (I am not a notary myself but most of our staff is).
May 1, 2009 at 1:33 pm #48545MemberI have a notary here in my office. I am more concerned about getting the paperwork I need from the previous owner. I spoke with them yesterday and I can tell you that they did not sound overly motivated to prepare this stuff for me….
May 1, 2009 at 7:07 pm #48546 T. WilesMember
Andrew,
I admire your diligence in your quest for the freedom of enjoying your customized boat.May 1, 2009 at 11:01 pm #48547 Cameron MortensonMember
Andrew…I’m enjoying seeing your project come together.
May 2, 2009 at 12:58 am #48548Jay Hake
MemberIt comes in many colors but at twice the price as black! He did say you could paint it with no problem though. I went with flat black on my boat. I’ll put some pics up as soon as we get some good weather.
I am sure it works great on deeper water boats, but I have heard of some folks who have had trouble with it on drift boats.
May 2, 2009 at 2:45 am #48549MemberTravis,
What kind of boat is that? It looks a lot like a Gheenoe, but the nose looks a little different. I haven’t seen one of those before. I like it.On another note, the marine plywood came in today. I got the front and rear decks rebuilt, but the glass work will have to wait until the morning. I will post some pics. of the progress tomorow. We are going to have to move the project indoors since the rain seems to have set in for the weekend…..
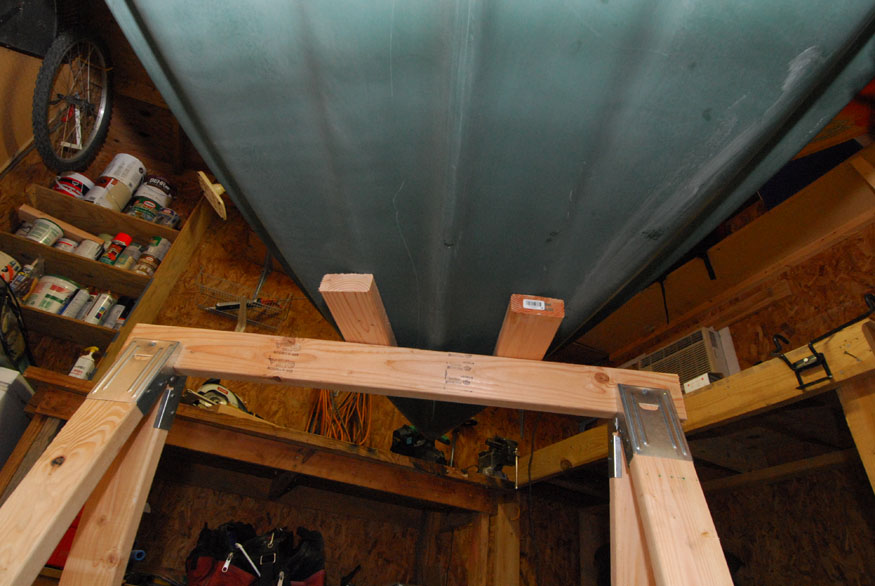
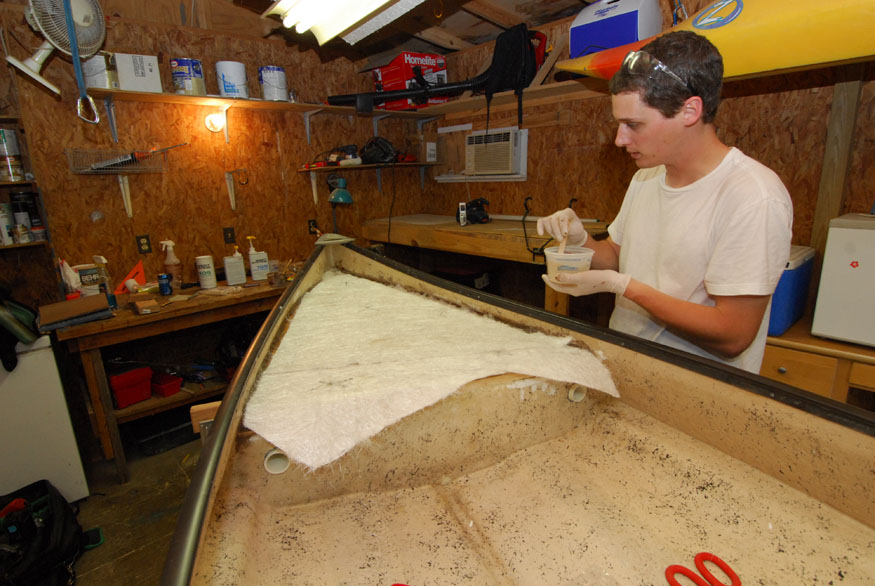
May 2, 2009 at 10:12 pm #48550The Itinerant AnglerOk boys, it was a rainy Saturday here in Atlanta, so we got back to work. We started out by cleaning out Andrew’s man cave (which he calls a ‘shed’ but I definitely believe is at least a ‘shop.’ Apparently building skyscrapers for a living tends to make one keep one’s nose in the air when it comes to workspaces).
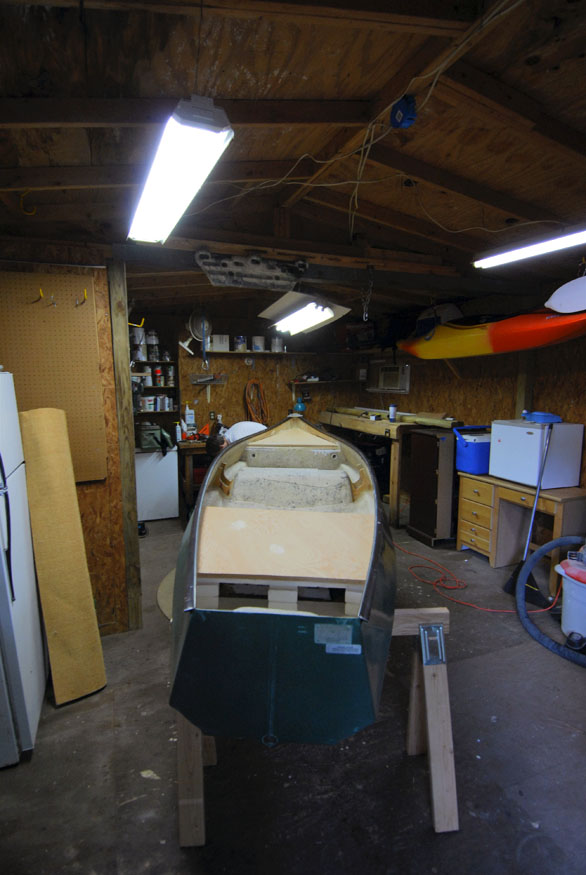
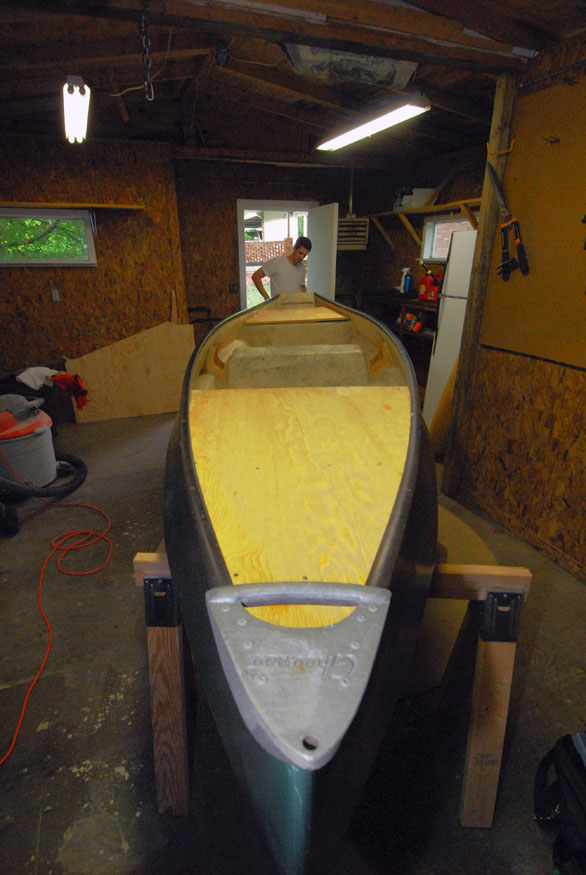
As you’ll recall from where we left off, Andrew had successfully procured some marine plywood, and had cut it using our earlier OSB decks as a template. Thus, the boat had considerably more structural strength (and was very pretty, for a redneck cluster job).
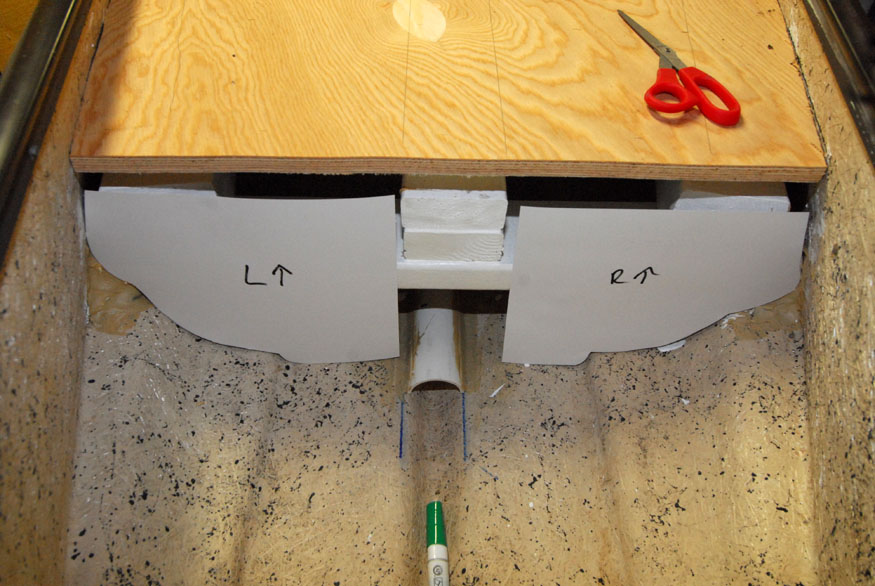
First things first, we had to get that rear deck panel in place to waterproof the rear deck. Andrew left it to me to template this thing. There’s no way to fit a solid piece in due to the shape of the hull (narrower at the top than the bottom, no room to go in diagonally), so we split the template in halves.
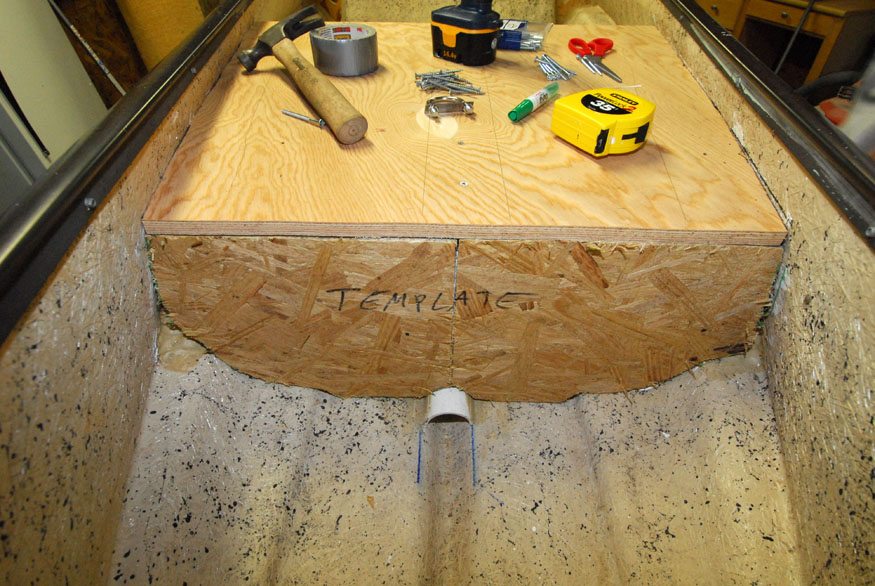
We then carved the rear deck template out of leftover OSB before finally cutting it in the marine plywood (not pictured).
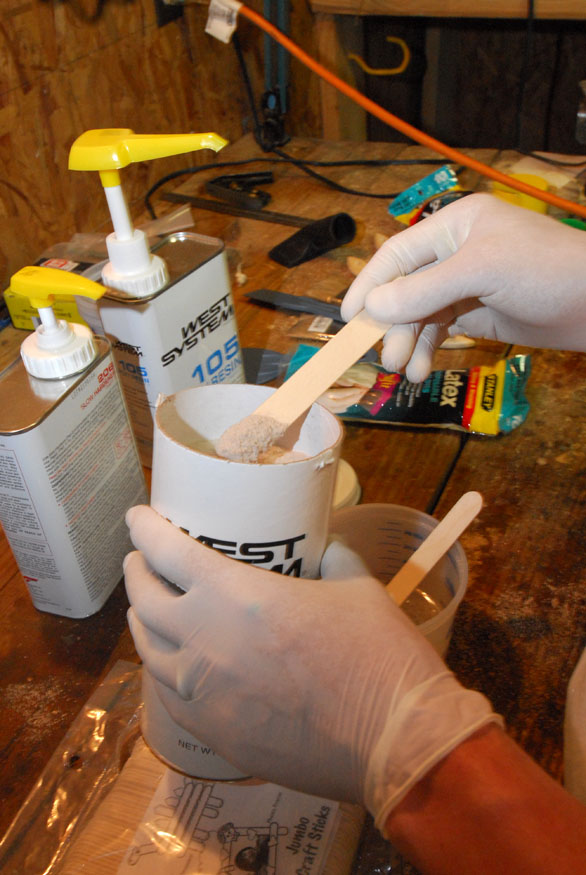
Next up, Andrew mixed a batch of marine epoxy up (the same stuff we used on my canoe once the Kevlar was bonded). He then added this filler material to make ‘fillets’ [sic?], which are essentially caulked beveled edges for the corners of where the glass will lay up. This was thanks to Andrew’s experience trying to glass the box at the suggestion of someone here on the board.

Andrew and I both took an active hand in scraping the fillets in with tongue depressers; ultimately not the easiest job (and messy – we went through a lot of latex gloves today).
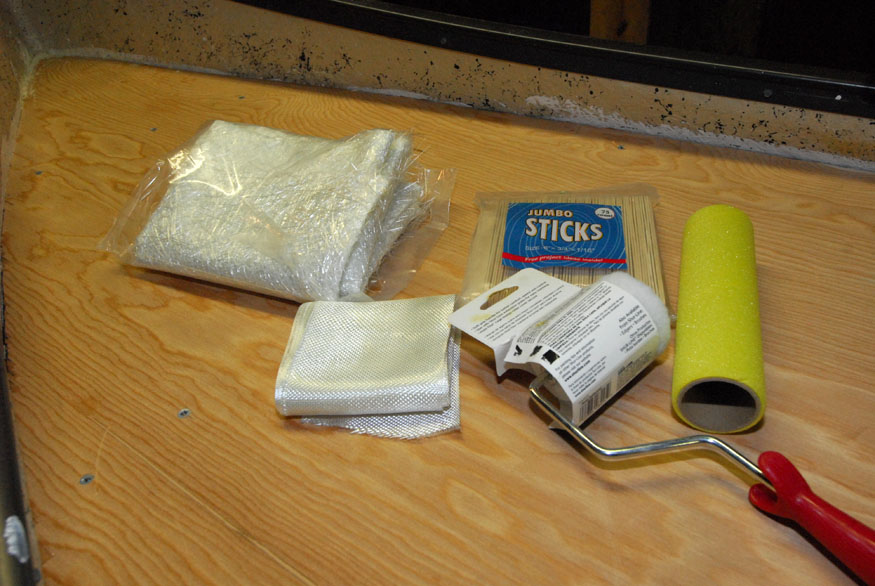
Here’s the stuff you need to glass in a boat (not pictured: all the other stuff you need to get to this point.)
First you have to make sure you have enough and have it cut out properly. Fiberglass cloth is fairly expensive at $16 a sheet, and it’s square obviously, so we made four cuts out of the sheet to reassemble it into the shape of the boat deck. There was almost none left of that sheet (thus, we had to make a run to West Marine for a resupply).
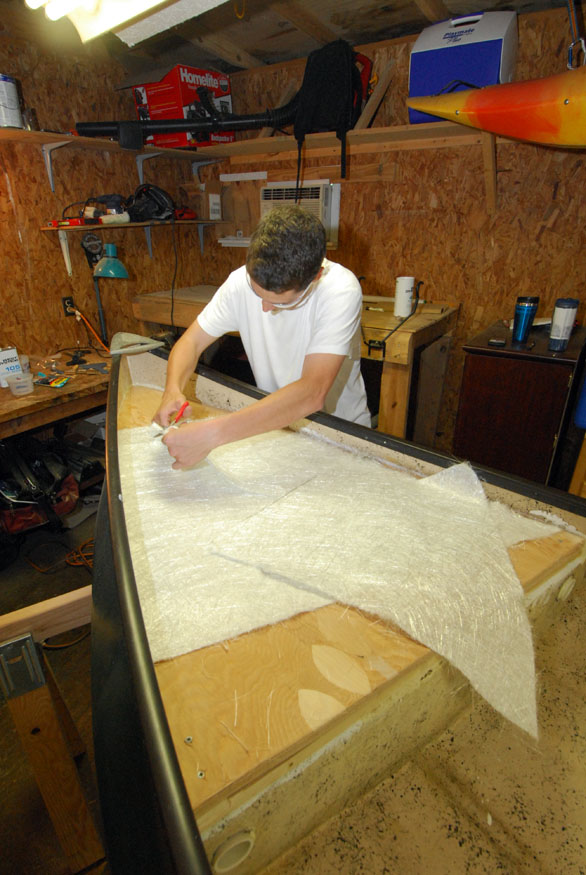
What you do first is lay fiberglass tape all along the edges of the fillets (not pictured because my hands were covered in epoxy and latex gloves). Then, once the edges are securely taped, you can lay the chopped mat over them for final application. We found it best to lay a fairly wet layer of epoxy under the mat, then another layer on top; when it wets out it goes clear-ish.
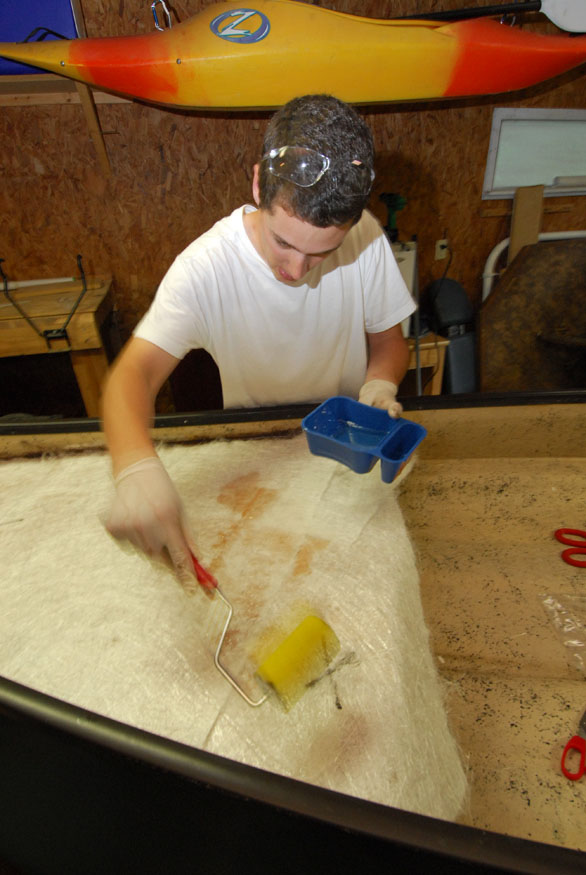
Once it’s all in place and stuck down, you basically just roll epoxy all over it and squish all the bubbles out. Of course, that’s kind of like saying you build a car by starting with some metal, but you get the idea.
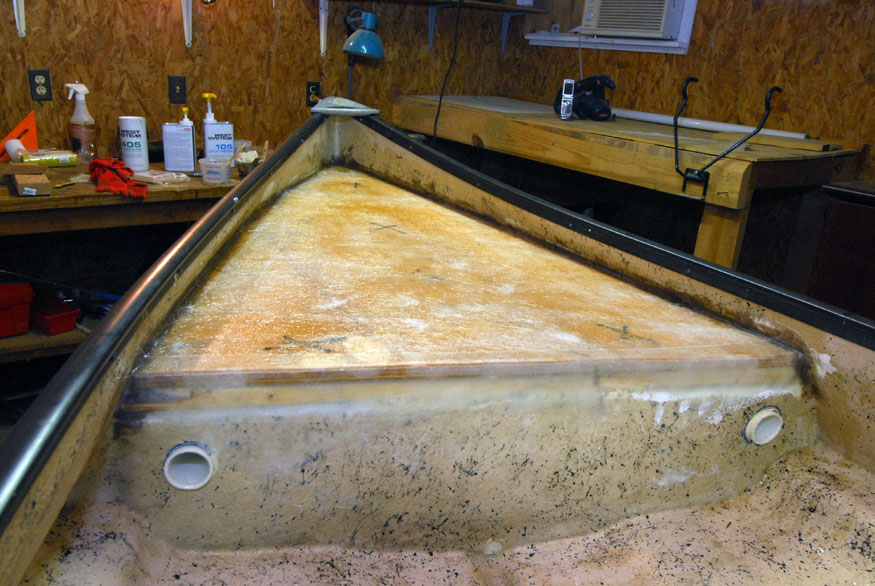
The rear deck was essentially the same animal, only with a lot more filleting along the rear panel we put in. We found that anything on the largish size void-wise would tend to have the epoxy run out of it. However, if you work some of the loose chopped mat fiberglass into the fillet compound, you can get it to lock in just fine.


It’s not the prettiest yet, of course, because it has to cure. Once cured, we’ll sand it, then paint it; it’ll look like a real boat once that paint goes down. With the exception of a little fine work around the front rod holders and the two buttresses we made to replace the metal supports off the central seat, the glass is in.
Beer Thirty.
Zach
May 2, 2009 at 10:39 pm #48551 Mike McKeownMember
Boet, that is looking as pretty as a peach…
Keep the story going…
May 3, 2009 at 12:29 am #48552darrell ditty
MemberLookin great!!!
May 3, 2009 at 4:40 am #48553cole m.
MemberLooking fantastic!
May 3, 2009 at 6:46 pm #48554paul_puckett
Memberi have a gheenoe waiting to be worked on.
May 3, 2009 at 8:37 pm #48555MemberPaul,
Yeah man, you will have to come by and check it out or get out on the water with us when we get it done. It has been a fun project, I would love to see what your plans are for yours. What model is it?May 3, 2009 at 9:01 pm #48556Memberpretty sure it is the 13 footer
it is down at our place at cumberland
I have thought about either doing it down there or dragging it back
I feel like I should do it here so i can work on it any time
basically my father in law said , “its yours”May 3, 2009 at 9:52 pm #48557 David AndersonMember
That’s really cool..
But –
How stable is the boat in the water with someone casting from the decks ?
www.dsaphoto.com
A picture is thousand words that takes less than a second while a thousand words is a picture that takes a month.
May 3, 2009 at 11:07 pm #48558The Itinerant AnglerDavid –
Very.
May 4, 2009 at 1:04 pm #48559MemberI am thinking about painting the inside with Interlux non-skid boat deck paint. Have any of you guys had any experience with this stuff? Any feedback would be appreciated. From what I can tell, it is pretty well suited for this type of application.
Hopefully I can paint it sometime this week after I get a little bit more of the detail work done and get it sanded.
May 4, 2009 at 1:11 pm #48560The Itinerant AnglerAndrew –
Does that paint require a primer? I was thinking; if you sanded, then primed, the interior of the boat, it would probably pull everything up to a fairly similar degree of texture, including the existing sections that didn’t get re-glassed.
May 4, 2009 at 1:25 pm #48561MemberZach,
One step ahead my friend. I ordered 2 of those this morning and the specs say to just lay a bead of caulk around the opening and drop the cup holders in. All we need to do is drill out the openings. They should show up sometime this week.Regarding the paint, the specs do call for primer. But the paint itself has some texture that gives it the no-skid properties.
-
AuthorPosts
- You must be logged in to reply to this topic.