


Project Boat
Blog › Forums › Fly Fishing › Project Boat
- This topic has 202 replies, 1 voice, and was last updated Jul 6, 2020 at 7:56 pm by
Zach Matthews.
-
AuthorPosts
-
Apr 19, 2009 at 5:18 pm #48502
 Steve K.Member
I’m eating this stuff up! Thanks for posting.
My only suggestion would be to swap out the OSB for exterior grade plywood. OSB is particularly susceptible to moisture. Better yet…. some 1/2 inch Nida-Core would be my first choice if you can find it locally. It also wouldn’t hurt to coat the 2x4s with epoxy to prevent moisture penetration.
Keep ’em coming guys!
Apr 19, 2009 at 5:53 pm #48503The Itinerant AnglerSteve –
We have discussed doing all of those things.
Apr 19, 2009 at 5:58 pm #48504Carter Simcoe
Memberat the bare minimum you should really coat all that wood with some polyurethane or something..
Apr 20, 2009 at 12:06 am #48505Andrew Wright
MemberOk. Day two of the modifications turned out to be a relative success as well. We managed to mount the rear platform that turned out to be more difficult than we originally assumed.
In order for water to flow freely underneath the platform we were about to build, we had to figure out how to keep the water from splashing up to wood structure above.

Zach had the great idea of ripping pvc to make a cover for the water channel. This was the result of the rip.

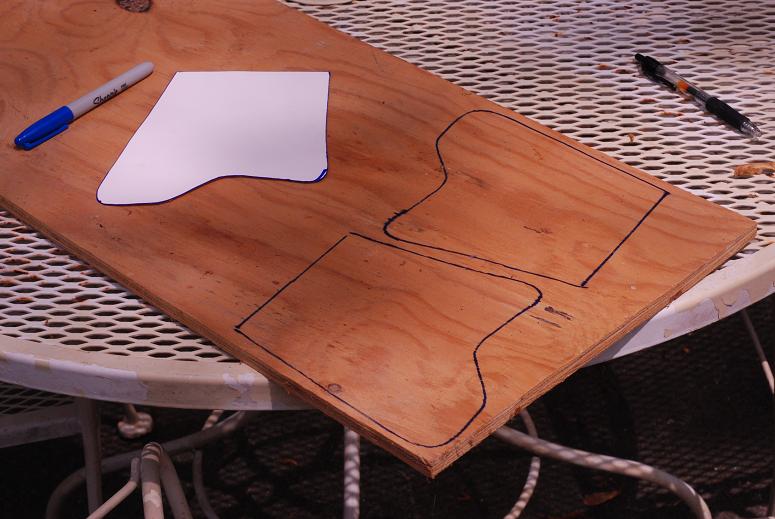
The next thing we tackled was the old metal strut design that was closing off access to the rod holder tubes. We still needed a way to brace the structure of the boat while opening up an area to store our fly rods. Again, Zach gets credit for the design, but I have to give credit to Lauren for coming up with a way to make the template. Due to the complex angles inside the boat, templates are tough to make, so we started the process with a mold-able wire before drawing it on paper.

After we got this piece formed, we traced the template on paper.

Then we transfered the templates to 1/2″ plywood before cutting them out with a jigsaw.
After that, we put the braces into place with high-strength adhesive.

This image shows both sides of the boat with two braces on each side. Ultimately, these will be glassed in and painted the same color as the rest of the boat.
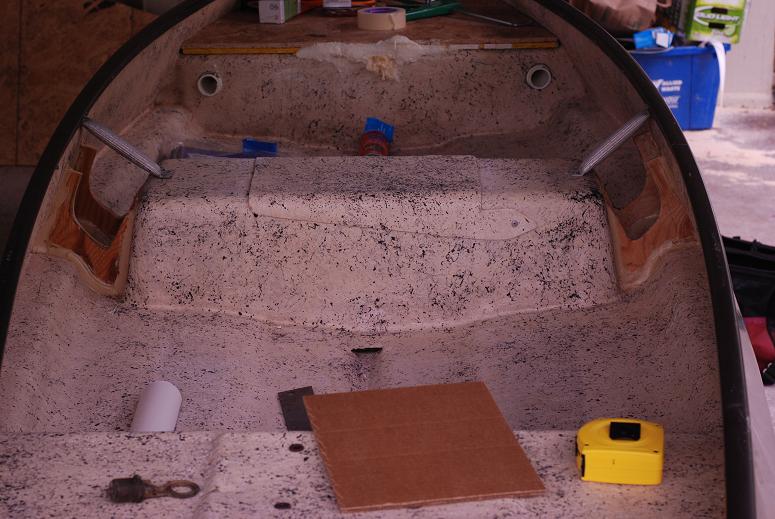
After this was complete, we got back to building in the rear platform. You can also see in this image that the metal struts were drilled out and removed.
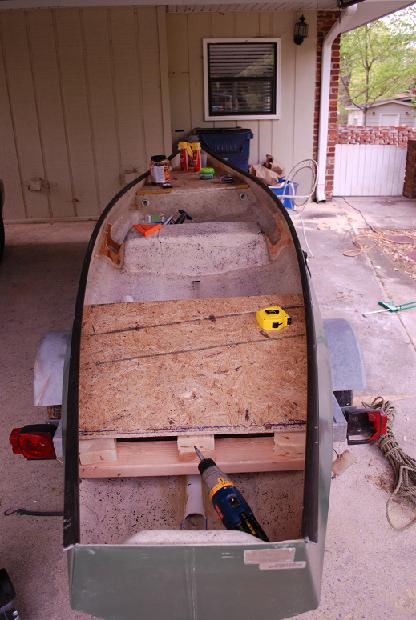
This is the view from the front of the boat with both platforms in.
We still need to mount the vertical panel on the back of the rear platform, but we got further along than either of us anticipated.
All in all it was a pretty good day. I would like to point out that neither of us are by any means skilled carpenters. I am sure that a lot of you guys could point out numerous flaws in the work that we have completed thus far. Ultimately, this amounts to a fun project and a great learning experience. In the end, while not perfect, I think the boat will serve it’s purpose.
I guess the glass work will have to wait until next weekend. We will keep you posted.
Andrew
Apr 20, 2009 at 12:35 am #48506anonymous
MemberI hate both of you !!!!!!!!!!!!! that looks like fun :))))
Apr 20, 2009 at 12:45 am #48507cole m.
MemberWow, awesome work! Looking forward to seeing the finished product.
Apr 20, 2009 at 12:53 pm #48508lawrence underwood
MemberLawrence –
Andrew knows all the terminology; he is a former home contractor who really does build skyscrapers for a living. I’m working on two summers of rough framing buildings and building swimming pools, so my knowledge is decidedly more limited.
Zach
I was just busting your chops a wee bit 😉
Apr 20, 2009 at 8:59 pm #48509Tim Pommer
MemberSweet stuff.
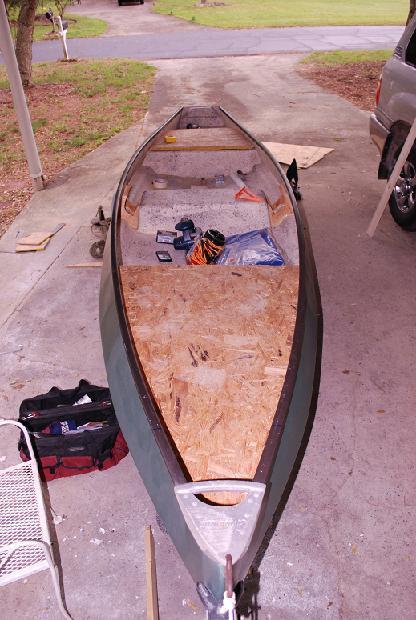
Apr 20, 2009 at 11:11 pm #48510MemberYou guys got me all freaked out about the moisture issue, so I came home today and hit the interior structure and decks with a couple coats of heavy elastomeric paint. I think that should do the trick. Thanks to everybody who has chimed in with some helpful insight. I have a pretty high level of confidence that this project will be a success.
The back deck looks crooked in the image because it is not screwed down yet.
Apr 21, 2009 at 12:05 am #48511gregg holland
MemberGreat boat! It looks like Andrew is about to get a kiss and a 12 pac…. Of Heineken no less….Well done boy’s, well done. Hey fella’s keep in mind the higher you go with the plateform the less stability you’ll have, especially with the narrow beam boat. If you have trouble with that, bolt on/removeable outriggers may be a option.
Apr 21, 2009 at 12:16 am #48512The Itinerant AnglerYeah, Heineken.
Apr 21, 2009 at 12:44 am #48513MemberThat is pretty low Zach. But at least I don’t have the nickname Zima like you do.
Sorry Greg, it was not Heineken. It was in fact Bud Light with Lime. It was also however, not my beer. It was my wife’s. So she get points for drinking beer, even if it is a little girly.
Apr 21, 2009 at 2:39 am #48514 Bob RigginsMember
Nice job guys.
Apr 21, 2009 at 1:18 pm #48515Mike Anderson
MemberNice work guys!
I’ve also done some cheap boat building projects too. I’ll go ahead tell you that the OSB won’t last very long. I doubt you can seal it enough to keep moisture out. Also, when it gets wet it swells big time. Coating it in fiberglass resin might be the best way to prolong moisture penetration.
Honestly though, as hard as you guys are working and as good a job as you are doing I wouldn’t scrimp on the material. 1/2″ Pressure treated plywood would be there for a loooong time. I’ve got some pieces of ¾ that might be enough to do it. You could have it, but you’ll have to come get it.Apr 21, 2009 at 2:38 pm #48516The Itinerant AnglerMike –
We’re going to lay fiberglass resin right on that OSB and glass it in.
Apr 21, 2009 at 3:21 pm #48517MemberZach I would completely encase the board with two coats of resin (dry between coats) then install it into place.
Apr 21, 2009 at 3:54 pm #48518Bob RigginsMemberI seems you guys are adding a lot of weight to use cheaper plywood.
Apr 21, 2009 at 6:46 pm #48519MemberZach I would completely encase the board with two coats of resin (dry between coats) then install it into place.
If you are going to keep the OSB, ditto.
Apr 21, 2009 at 7:12 pm #48520MemberZach, Andy,
Looks very good guys.
Apr 21, 2009 at 8:49 pm #48521MemberI think you guys have sold me on the marine plywood route. This project has been fun, but I really don’t feel like doing it again in the near future. I am currently doing a little investigation to try and figure out where I can purchase this material. If any of you have any suggestions let me know.
Also, will the marine plywood need any other form of protection if I am going to glass it in?
-
AuthorPosts
- You must be logged in to reply to this topic.