


Budget portrait studio for a noob
Blog › Forums › Photography › Budget portrait studio for a noob
- This topic has 38 replies, 13 voices, and was last updated Apr 15, 2009 at 7:53 pm by
dsflyman.
-
AuthorPosts
-
Feb 6, 2009 at 12:52 am #7989
dusty montgomery
MemberThis Easter, I will meet for the first time my new nephew. And since I have gotten into photography, everyone in the family thinks I should take some pictures of the little one (hopefully they do not realize how much I still don’t know). Anyway, I am using a Rebel XSi w/ 18-55mm kit lens, and I bought a 50mm f/1.8. That is the extent of my gear at present. Before Easter though, I will have a 430 EX II flash, tripod, and maybe even a 100mm macro.
All this being said, the questions I bring to you all centers around taking shots of this new one and they actually looking good. So, if I were to set up a small portion of a room to shoot in, what would I need? Should I get some white backdrops and black ones too? What about white boards to bounce some light off of? Will the new flash I am getting b sufficient, or is there an excuse here to get two? (Which I could use later for flies!)
Thanks for any help you guys can offer.
DustyFeb 6, 2009 at 1:51 am #67216Aaron Christensen
MemberTry setting your 50 mm lens to 1.8 (for a narrow depth of field) and take some photos outdoors, with natural light. IMHO, natural beats even the best studio.
Feb 6, 2009 at 1:53 am #67217txbluegill
MemberYou might consider a light stand and umbrella (shoot through or bounce).
Feb 6, 2009 at 10:52 pm #67218 David AndersonMember
with natural light. IMHO, natural beats even the best studio.
😮 😮 😮
Quick – stone the heretic !! 😀 ;D
I agree with Arron (ducks for cover ;)) for the most part, but natural light isn’t always perfect and can change quickly, while studio lighting (in or outdoors) gives consistency to photos.
The idea of shooting outside with a 50mm wide open is a good one, the lens is ideal for that sort of photography and will give you nice milky portraits if you keep things framed tight and the background at a distance.
The 50 will also get you nice shots using natural light in the house near windows.
I’ve done a lot of the shots of my kids in and around the house with a 50mm or 85 mm in natural light because it’s quick and easy and the only way to keep up with the little s***’s…That said, home studio is a good thing and the umbrella idea is a good one as is getting some reflectors and backgrounds.
In the studio we use big sheets of styrofoam for reflectors – not sure where you get them, but they don’t cost much and work great.
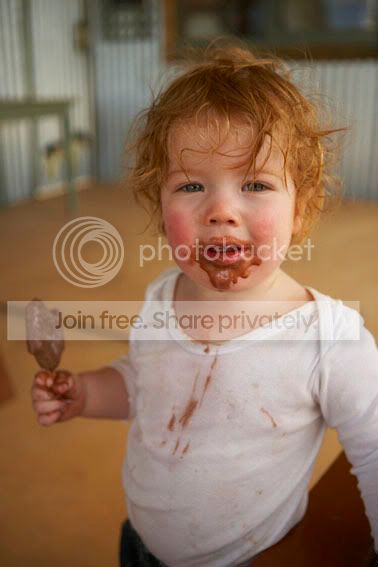
Having one of the fold up round silver and white reflectors from someone like Lastolite is also very useful for general photography.Here’s some examples of portraits shot at big apertures in natural light.
(Any excuse to show of the kids ;))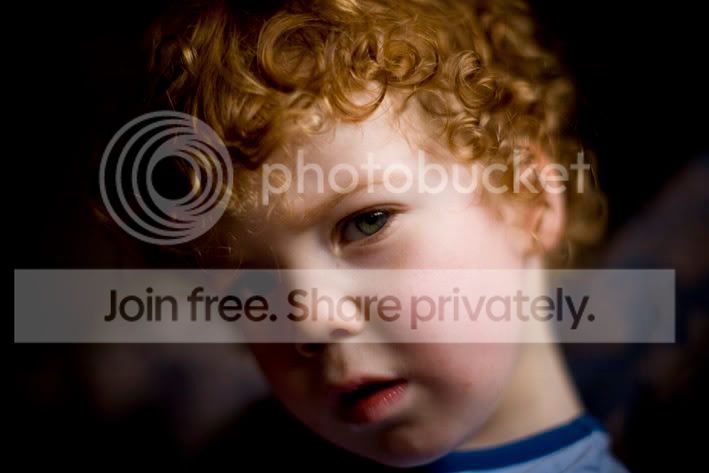


www.dsaphoto.com
A picture is thousand words that takes less than a second while a thousand words is a picture that takes a month.
Feb 7, 2009 at 3:50 pm #67219MemberDavid, excellent post and examples.
I did a poor job in communicating my thoughts. I prefer natural or “real” settings for kid photos, as opposed to studio settings. I agree that studio lighting can be better than natural lighting, especially if the natural lighting conditions are poor.
Feb 7, 2009 at 4:41 pm #67220Buzz Bryson
MemberDusty,
Suggest you practice at home with a doll (seat cushion, whatever).
Feb 9, 2009 at 8:44 pm #67221MemberThanks for the input guys. I am going to get some black and white pieces of thicker posterboard and try some shots before the nephew, 3 months old, get to my house. your how-tos make sense, and I think I can put them together, we shall see!
David-I do not really know the right nomenclature yet, but I love the light in your photos. That has been my biggest nemesis. All of the examples you posted are nat. light, no flashes or anything else creating light?
Feb 10, 2009 at 4:16 am #67222David AndersonMember#1 is in a dark room, though next to a large window on a grey day – the lens is a 50 1.2 wide open and that adds a lot of the character in the shot.
(1000th sec @ 200 ISO)#2 is done at f2 on a 50 1.4 @ 800 ISO – I converted it to B&W because the color from the down lights was nasty.
#3 is in shade under an awning though Xavier is facing the light.
The lens is a 24-70 at 40mm and 2.8The last is done with my favorite lens, the 85 1.2 – it has a look all it own and melts even strong backgrounds.
Edward is only 4 feet in front of a tree there, yet it’ still soft.
It was shot at 1.6.Fast lenses are great for natural light and portraits in general, but you need to take a lot of shots because your depth of field will be paper thin on some of them when wide open.
Mama bear might not like it much, but if you can lay a blanket down in the shade and shoot tight with a fast lens you will get nice shots – just keep an eye on the white balance to keep the skin-tone nice.
www.dsaphoto.com
A picture is thousand words that takes less than a second while a thousand words is a picture that takes a month.
Feb 10, 2009 at 2:38 pm #67223MemberMama bear might not like it much, but if you can lay a blanket down in the shade and shoot tight with a fast lens you will get nice shots – just keep an eye on the white balance to keep the skin-tone nice.
I have played around with the white balance settings while inside under incandescent lights and was not happy with the results. While outside, I should set the white balance to nat. light, or leave it on AWB?
Dusty
Feb 10, 2009 at 3:28 pm #67224lee church
MemberSo I got suckered into doing senior pictures for my cousins this last summer.
Feb 10, 2009 at 4:20 pm #67225MemberThanks for the info. Lee. I will check out the link and look up the terms you provided. I am starting to feel like I am back in college with my research skills resurfacing! Another photog. buddy of mine told me to look into specularity of light…still working on this one, but I think it is beginning to sink in.
D.
Feb 10, 2009 at 4:40 pm #67226 Ben CochranMember
Hey Dusty,
Honestly, before considering what you need for the shot, you really should try and map out the composition that you want first. Without that, you really don’t know what you may or may not need to get the desired lighting effect. As David mentioned above, white foam board is great and if used properly, it can give the effect of several additional strobes. (Lovely shots, by-the-way, David !)
Also of importance, what type of environment do you plan on shooting your photographs in, one must consider the Kelvin of competing ambient? One must also use extreme caution in the butterfly placement as it can cast some very unpleasant, intense and ugly shadows into the character of your subject, reflectors or additional strobe’s, to counter balance, are almost always mandatory. It can yield some nice results though…
Map out what type of composition you want and perhaps we can then toss out some potential lighting blue prints for you. Have fun with it, it truly is the most enjoyable part of photography IMHO 🙂
Feb 10, 2009 at 5:00 pm #67227MemberAlso of importance, what type of environment do you plan on shooting your photographs in, one must consider the Kelvin of competing ambient?
Ben,
I am almost sure all shots will be taken inside my place, which actually has very poor lighting. I do not think Mama Bear will let me take her new born down by the lake :'( With this in mind, I have been planning on shooting next to a sliding glass door which lets in plenty of light, positioning the subject between the sliding glass and the reflector boards. I also plan to place the baby on white sheet or black sheet, take some shots and go from there. This is the first time I have ever tried anything like this, so there will be a lot of experimentation. I have a blooming Amarillas right where I plan to place the baby, so I will be able to take many test shots to play with the light
Thanks for all of your help guys; You bringing things to mind that I would have never considered.
Dusty
Feb 10, 2009 at 5:30 pm #67228Ben CochranMemberIn that case and dependent upon the amount of sunlight that comes in through the door, you may not need any strobes at all. How much direct sunlight comes in through the glass? Also, more than likely you will have to use early or late direct sun angle and this kelvin will probably not blend well with your interior light. No problem as you can use a reflector for bounce, this will serve as an additional light source.
What you can do is: Lay the baby so that the feet are towards the door and head away (90 degree angle with the door). Tape a white sheet on the glass, just high enough to diffuse only the light that would hit the baby and then place a reflector in the overhead position (butterfly position), make sure that the light that hits the reflector is not part of the diffused light as it will diffuse on the bounce (This will allow the reflected light to serve more as a primary) Set your camera near the glass but slightly off to the side so that you do not block the light source or cast shadows onto your subject.
For testing: Try placing a pillow or baby doll (as has been mentioned) there, with a non white pillow case, and test shoot through out the available sun cast time frame. This should help you schedule the best possible time and light for the actual shot.
If you are up to it, do a test shot with the pillow and we can help better map it out for you.
Feb 10, 2009 at 9:32 pm #67229MemberBen,
The light is not direct. This sliding glass door face WSW, and by the time the good soft light comes down, the sun has peeked behind a three story building, though there is still light for some time afterwards.I am going to get some boards, read up on the Kelvin temps that keep getting mentioned, and take some practice shots using all of y’alls advice. I am sure some of Scott Kelby’s ideas will be thrown in for effect as well. It will likely be this weekend, but when I get the images I will post them.
Thanks again guys, and Ben and David, as always you have been especially helpful.
Dusty
Feb 10, 2009 at 11:45 pm #67230David AndersonMemberDusty, I like Ben’s idea of diffusing the light through the window for simplicity – always a good thing with mama bears and cubs.
www.dsaphoto.com
A picture is thousand words that takes less than a second while a thousand words is a picture that takes a month.
Feb 11, 2009 at 1:33 am #67231MemberNot to be a complete dumb-ass, but does my XSi have a function where I can change the Kelvin, or is a meter needed, or am I completely missing something?
Dusty
Feb 11, 2009 at 1:58 am #67232David AndersonMemberI checked the specs on dpreview.com and it looks like it doesn’t have a manual setting
So looks like you would have to set it to ‘cloudy’ or ‘shade’
Might be worth a look through the manual.. 😮
www.dsaphoto.com
A picture is thousand words that takes less than a second while a thousand words is a picture that takes a month.
Feb 11, 2009 at 2:20 am #67233MemberBelieve it or not, that was actually one manual I read cover to cover. I did not recall anything about Kelvin, nor do I recall seeing it in Understanding Exposure. I am currently working on Scott Kelby’s two volume Digital Photography, but I have not run into Kelvin yet. I understand the principle, but I still do not fully understand how it applies to photography. Now I am regretting getting the XSi. For what I paid, I could have got the 40D, paid a little more and got the 50D. Oh well, live and learn. Maybe I should just say to hell with it and go get a 5D.
Thanks for doing that leg work David.
Dusty
Feb 11, 2009 at 3:48 am #67234Ben CochranMemberDusty, it is a lot more complicated than this but in an effort to describe Kelvin, I will submit this. Our eyes and the camera sensor do not see objects as much as we receive measured frequencies that define the depth and color of objects. All of these frequencies are really bounced frequencies (colors) that are affected by the Kelvin (hue) of the light sources. Our eyes do an amazing job of adjusting for multiple Kelvin’s at one time but the camera sensor can only adjust for one Kelvin at a time. The Kelvin (hue) is determined by the temperature of the light source as variable heat ranges give off different frequencies (color). The object, with a camera sensor is to try and match the Kelvin of the light source so that your final shot does not have a competing Kevin, with what you set in camera, this is the WB process.
Keep in mind that WB is not mandatory! As you get a better understanding of Kelvin and frequency grids, you may want to purposely set your camera to a competing frequency to better attenuate or amplify competing Kelvin’s. I posted this shot to show what I am talking about. I think I may have posted this before but I shot this on tungsten so that I could amplify the competiting Kelvin’s. A little happy add here: I sold this to authorized Adobe Training Center, hanging in the class room to illustrate the effects of Kelvin and how to compose it; a good little happy feeling as I am a huge Adobe fan :).

-
AuthorPosts
- You must be logged in to reply to this topic.