






I'd forgotten how difficult this is
Blog › Forums › Photography › I'd forgotten how difficult this is
- This topic has 27 replies, 5 voices, and was last updated Jun 10, 2013 at 9:14 pm by
 Brett Colvin.
-
AuthorPosts
-
Jun 6, 2013 at 10:44 pm #73935
Zach Matthews
The Itinerant AnglerTrying to shoot some studio stuff and make it float. It doesn’t help that my background needs ironing…
Attachments:
Jun 6, 2013 at 11:15 pm #73937The Itinerant Angler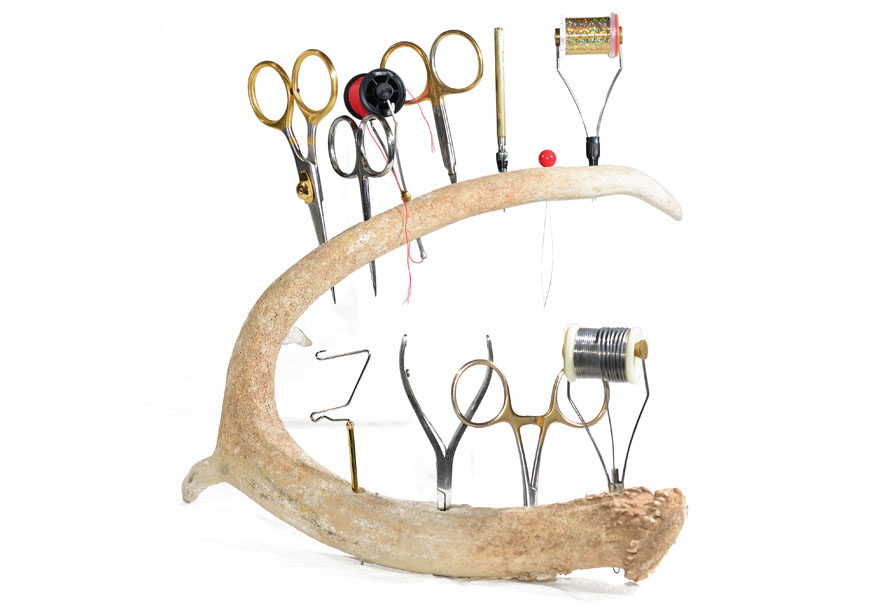
That’s a little better.
Jun 7, 2013 at 12:12 am #73938The Itinerant Angler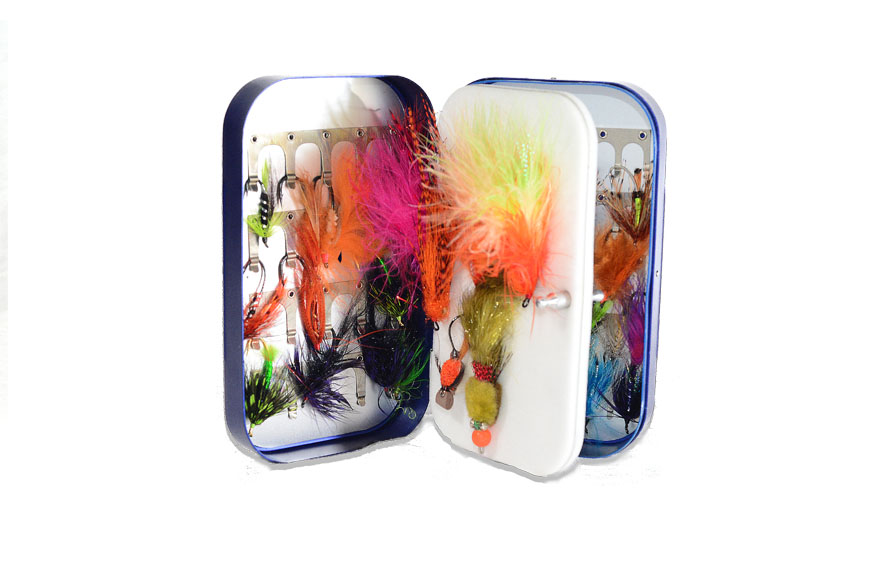
Shadow’s a bit raggedy.
Jun 7, 2013 at 12:21 am #73939 Ben CochranMember
Hey Zack, on your first shot: Try to not shoot down on your subject, as it kind of pushes the object down and gives it a feeling of being supported. Also, try to bounce a bit more light onto the front and, if the shot allows, try to not shoot it so fat and turn it just a little. Play with the handle a bit and find a better placement for it, perhaps down lower.
In your second shot: Remove the shadows in post and I would probably try to get all of the tools set to the same angle. I would set them at an angle that delivers the best specular and unlike the same as above, I might try some angles from above the subject. Like your tool cradle too! 🙂
Hope that helps some and if I get some time, I will set up my gear and do some shots, to help better illustrate what I mean. Do you have to use a white background?
Jun 7, 2013 at 12:31 am #73940Ben CochranMemberHow are you erasing the shadow,in your third shot? I might suggest a duplicate layer of your base shot and then clone the background over the perimeter of your flybox. Duplicate the base layer again and place it over the cloned background layer. Set this new layer with a mask and paint the shadow away. When you get close to the edge of the flybox, use a very small brush and set the strength to a soft edge, which feathers closer to the actual edges that do not require masking away. With the background cloned layer underneath this layer, the natural background will appear with no shadows and better present the illusion of floating.
Hope this helps and that I explained it well.
Jun 7, 2013 at 1:21 am #73941The Itinerant AnglerThat’s helpful Ben, thanks man. I think the ideal way to do this would be to have some kind of pedestal to elevate the object, then enough space between it and the backdrop to allow the backdrop to totally blur when I nail it with a remote flash hiding behind the pedestal. Then I believe I could more or less light the object normally and go from there. The Holy Grail would be a setup that didn’t require erasing anything in post.
Good tips on aligning the objects so I can control the highlights. I was just looking for something to shoot, to be honest. (See below). Hahahah.
 Jun 7, 2013 at 3:29 am #73942Ben CochranMember
WOW Zack, he or she is absolutely precious! Love the look, kind of like “You had better make me look good, bub!” lol
You know, I think that a huge part of the fun and satisfaction, in this discipline of photography, is making the unbelievable believable. This and nailing it is kind of the Holy Grail, in and of itself. Of course, I say this just because I don’t want it to be so easy that anyone and everyone can do it. 🙂
There are numerous ways that this type of photography can be shot, then polished in postproduction but writing out how I would set it up would be a waist of your time. As I have enough strobe lights to make a blind man see. What I can do is, limit the setup to the amount of lights as that of your setup. Or, we can just set this up as a challenge to everyone that wants to get into this and establish the restriction on the amount of and type of lights. Nonetheless, give me an idea of how many lights and I will effect a set with the same type of objects, then share the image and lighting arrangement. I am guessing that you are going for that catalog product shot and not something more commercial or fashion illustrative.
In the mean time: Can I have that precious dog? 🙂
Jun 7, 2013 at 7:50 am #73943 David AndersonMember
Looking good Zach.
Another thing to play with is pumping some flash from below.
Works very well on semi-translucent plexiglass or even thinner white paper backgrounds.Another thing is have a flat shooting surface and a backboard (both white) with a lot of distance between.
Then you can light the background and product (cute dog) separately.www.dsaphoto.com
A picture is thousand words that takes less than a second while a thousand words is a picture that takes a month.
Jun 7, 2013 at 12:50 pm #73946The Itinerant AnglerBen –
At one time I had three SB-600 flashes that I could slave but for various “life reasons” I am down to two. I have the ability to elevate one via a dedicated tripod, and then the D600 has your standard prosumer Nikon on-body flash, which isn’t all that powerful.
To set these up I put out a table with a draped sheet laying over it. The sheet needs to be ironed. I put the product on the table then elevated and angled each flash so they were firing down from about a 60 degree angle on each side at the product/sheet. I am using a 60mm Micro-Nikkor lens and a shutter delay or remote trigger (for which I need new batteries). So I basically had to hold one flash up. Both are slaved via Nikon’s Commander Mode.
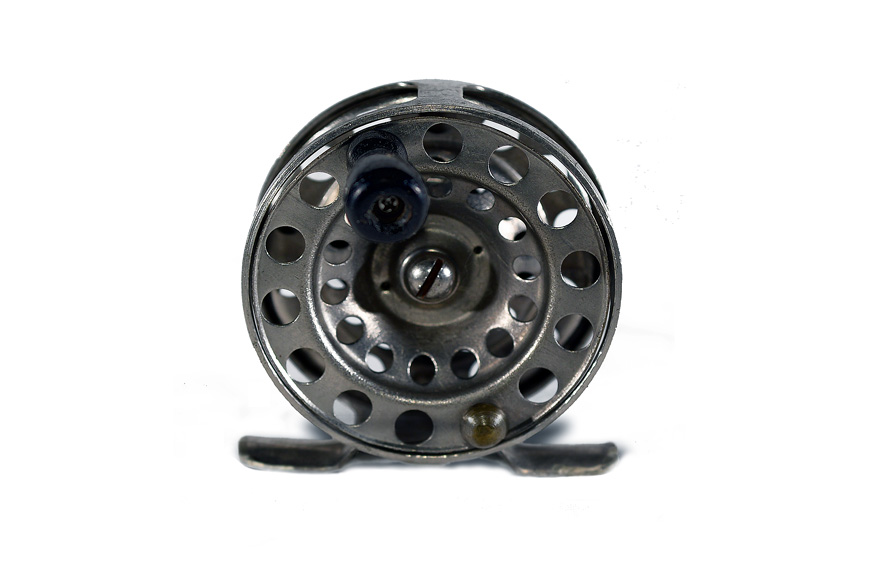
I had the camera body set to manual and was controlling for aperture and ISO primarily. I could have achieved the same thing as the ISO variable with shutter speed. Aperture on the Micro-Nikkors is tricky as I am sure you know, since they can go all the way down to like f/60 and they will pull even what seems to be items in exactly the same plane out of focus if you set it wrong (see the handle on the silver reel above).
Anyway I’ve managed all of that before. The hardest part though is getting the shadows to work and avoiding cutting off parts of the bottom of objects when I set it in the somewhat soft sheet. As David and you were both describing I think the solution there is mechanical; I believe I need some sort of post or pedestal to elevate; either that or separate the backdrop from the table itself, which fortunately is also white. (I could also paper it.
Jun 7, 2013 at 12:50 pm #73947The Itinerant AnglerOh and PS that’s Gretchen, my wire-haired pointing Griffon. I gave her a haircut for the summer since I live in Georgia, USA (hot climate).
Jun 7, 2013 at 10:20 pm #73954Ben CochranMemberI will try and set something up over the weekend and keep it limited to two hotshoes. Along with what David mentioned, I have known some to actually use a softbox as a platform and shoot up into it, casting diffused light up onto the above object. Scott Kelby will sometimes use a very large softbox, as a background, for high key shots, as well.
Nonetheless, if you do want some shadows, it is best to use a hard flat surface; this will prevent your object from sinking down into it, obscuring portions of it. I will shoot something over the weekend and then write up some thoughts and techniques, keeping in mind that everything is based on the use of just two speedlights and option of on camera flash.
P.S. Gretchen is going to love living in my home. lol
-
This reply was modified 13 years, 4 months ago by
 Ben Cochran.
-
This reply was modified 13 years, 4 months ago by Ben Cochran.
Jun 7, 2013 at 11:08 pm #73957 J A Y M O R RMember
Zach,
{echoing what David Anderson has mentioned)
Rather than use a sheet, you can use anything white. I use poster board a lot or anything white. I use my lights to blow out my backgrounds white. I use the same technique with product photography as I do with my subjects in the studio.This shot was a grey wall. I used to strobes to blast out the wall and the grey concrete floor. I use this technique with product as well. The trick is to pull your subject far enough away from the backdrop and to also “flag” the light in the direction you want it to go. The below I used a three light setup. Two lights on the back drop to blow out my whites and a single key light in the front. You could do the same with product work. Find a white wall. Grab a poster board and blow out the background:

Same dealio here:

Reverse the technique now and get black backgrounds on white walls. Just pull the subject further away from the background and let the light fall off. With product photography and portrait work I have been able to find great results with controlling light using these methods. This last shot is for you LOL 😉 Single strobe white wall…

Give it a try.
-
This reply was modified 13 years, 4 months ago by
 J A Y M O R R.
Jun 8, 2013 at 12:42 am #73959Ben CochranMemberHey Zack, I was mapping out some lighting scenarios and then remembered that a very good friend of mine did a great write up, of a single source lighting solution, for Westcott. I think that you may really like this, as the dark field lighting scenario only requires one light source but you can then add some front fill, if desired. Granted, this is what would be defined as “low key’ lighting but it works out great for commercial advertising product photography. You can also change the two front flags with white cards and bounce some light back onto your subject, as well.
As far as the primary lightsource, remember that the light source is always the last place that the light comes from. In this case, hang your white sheet behind the set, as if it is a scrim. Then shoot the D600, with the diffuser dome on, through the white sheet and into your set. Same thing as I mentioned above; make sure that you have your subject on a harder surface. If you want the elevated floating look, have your camera set below the mid point of your object. For floating below; slightly above mid point and turn your object slightly tilted away and turned to the side. For catalog product shot; mid point and change the lighting solution to promote slight shadow, will require heavily diffused light from above the object; I will try to shoot this one over the weekend for ya and make it high key. 🙂
Scott is a very good friend of mine, PS and lighting author as well as one of my moderators over at the NAPP, here is the link to the article that I mentioned above, hope it gives you some good ideas. 🙂 http://fjwestcott.com/photo-lighting-tips/quick-tips/tog-tuesday-dark-field-imaging
-
This reply was modified 13 years, 4 months ago by Ben Cochran.
-
This reply was modified 13 years, 4 months ago by Ben Cochran.
-
This reply was modified 13 years, 4 months ago by Ben Cochran.
Jun 8, 2013 at 12:49 am #73963 Brett ColvinMember
My advice is: No sheet Sherlock.
Poster board as has been mentioned or a sheet of white Formica will give you an inexpensive and re-usable sweep. I am not sure what you are diffusing your SB600s with, but something like a Lastolite Ezybox will wrap the flash around your subject and eliminate a lot of the post effort.
Setup here is a softbox camera left and camera right, poster board sweep:

 Jun 8, 2013 at 12:59 am #73964Ben CochranMember
Thanks Bret, you just freed my weekend up lol. GREAT shots, by the way! I don’t think Zack has the softboxes, but I have some DIY ideas that I hope to work on this weekend. You did a great job on your postproduction work, as well. 🙂
Jun 8, 2013 at 1:53 am #73965Ben CochranMemberHey Brett, can you help me out with your shots and setup’s? I am normally really good at dissecting lighting and for the life of me, I am trying to see how your only lights were set at camera right and camera left. If you don’t mind, I am interested in how you got your specular from above and from behind. I have been doing this for a very long time and I do now how to get this type of specular and how to place and set shadow density but that would be with either bounce, flags or extra lights, just curious how you did it with just two softbox’s? Also, trying to understand the shadow density in your shots, did you suspend these or replace the background’s? Reason why I ask is because I noticed that there is shadow density where there would normally be bounce specular. Like I said, great shots but I am trying to figure out why the shadow density and specular density aren’t behaving naturally. Thanks for any input…
Jun 8, 2013 at 1:55 am #73966Ben CochranMemberOh yes, nice shots Jay! Meant to mention it earlier but got to wrapped up in writing my post, sorry about my short memory. 🙂
Jun 8, 2013 at 3:30 am #73967Brett ColvinMemberBen: Thanks for the appreciation man, I can tell you have a keen eye.
My softboxes for this setup are pretty good-sized (24×36) which gives me a lot of wrap. I position them a little higher than the subject on either side and very slightly in front – perhaps about 10° relative to the reel. The top light is a result of having about 50% of the softbox higher than the reel. There is no 3rd light source from above.
My poster board is a 90° sweep, and it gives me bounce from the rear. The up-sweep begins about 2 feet behind the subject – far enough to avoid texture in the BG but close enough to easily return light from the boxes.
The reels are not suspended, but sitting directly on the posterboard which I blow out as much as possible with the strobes. In post, I make sure my white point is set where I want it and if any tweak is needed I can bump the levels on the surface with an adjustment layer.
Same type of setup here:
 Jun 8, 2013 at 4:14 am #73968Ben CochranMember
Thanks for taking the time to better explain it Brett, that better explains all of the specular and shadow density now. So, your lighting is actually more subject right and left high, my confusion came from camera right and left, as that would not justify the effects that you have. Actually, this is exactly how I had planned on lighting the set but coming up with a method to both gain the diffused properties and keeping in mind that Zack only has the one light stand. I think I know how I am going to do this and use only the equipment that Zack mentioned, with the exception that he may have to purchase some white foam boards.
As I stated, you did a FANTASTIC job on these shots and should feel very proud of yourself. I can see that you did remove some shadow cast form your images but also found your originals on Google. Was and am very impressed, as you really did not have very much to do in postproduction and had very minimal shadow cast.
If I may share this bit of history and one of my main inspirational photographers, the best mentor that anyone could ever want and one of the best photographers that there has ever been. The late great Dean Collins was very famous for creating multiple light sources from a single unit. Much like how you used that side of the softbox to light the background, Dean used to shoot part of the light into a scrim and over shot the scrim to light an additional source, bounce off of an additional source or direct the portion to a mirror that would redirect the light to the same destinations. Pretty much the exact same thing that I am planning for this shot, to help maximize the yield out of two hotshoe’s.
Anyway, thanks for better explaining all of this and helping me to realize that I have not lost my mind yet. 🙂 Again, Great shots and if I can add anything, I might suggest playing with some different angles and relative bearings to your subject; not that you need to but I think that you will really like some different perspective’s. 🙂
Jun 8, 2013 at 4:22 am #73969Ben CochranMemberOh yes! Wanted to mention that I love those Ezybox’s so much that I purchased 5 of them. Great choice, on your part, as that inner baffle really does deliver some incredible diffused light. Love them and strongly recommend them to anyone and everyone!.
-
AuthorPosts
- You must be logged in to reply to this topic.