


Photographing Fly’s in the Vice
Blog › Forums › Photography › Photographing Fly’s in the Vice
- This topic has 13 replies, 8 voices, and was last updated Dec 14, 2008 at 8:59 pm by
 Mike McKeown.
-
AuthorPosts
-
Nov 28, 2008 at 8:13 am #7851
 Mike McKeownMember
I have a little predicament. My last 2 pod casts have had the same 2 flies as favorites, they are distinctly South African patterns and I doubt that any of my international listeners have ever seen them, thus I need to do Step by Steps for them. The issues is my resident fly tier, kicked his wife in the back, and she is due to pop soon, so he can’t do it, thus I need to figure it out…
OK, so we have had the “light box” thread, the “Macro for other uses” thread, the “On stream macro” thread and many more, but I am still a little baffled by taking fly tying, Step by Step pics…
I have built kind of a light box; it’s OK, with a blue infinity curve as a back drop. 2 reasonable lights, no flashes, and I am using an Olympus E500 without a macro lens.
Q1. How far away from the fly should I be? If I go too close I can’t focus and too far away, I loose depth of field, DOF.
Q2. How do I increase the DOF if I shoot in macros mode? The camera wants to set it to f8, I know I can over ride it, but will that screw up other settings.
Q3. Do I tie a fly a few sizes up to show the fly nicely? I like the pattern in a 16, but I am finding that it is a little difficult to get the fly to show properly in the pics, hopefully the comments you guys will give, will help.
Q4.Nov 28, 2008 at 1:45 pm #65872 John BennettMember
Not much of a tier so I can’t help there.
Q1. How far away from the fly should I be? If I go too close I can’t focus and too far away, I loose depth of field, DOF.
Q2. How do I increase the DOF if I shoot in macros mode? The camera wants to set it to f8, I know I can over ride it, but will that screw up other settings.
Q3. Do I tie a fly a few sizes up to show the fly nicely? I like the pattern in a 16, but I am finding that it is a little difficult to get the fly to show properly in the pics, hopefully the comments you guys will give, will help.
Q4.Nov 28, 2008 at 2:46 pm #65873anonymous
MemberMike-
You could try-
Set up your cam on tripod
Nov 29, 2008 at 4:43 am #65874Daryl Human
MemberMike, the onstream macro thread is worth another read boet.
Especially the last section where Neal has gone into quite some detail re photographing flies, and the distance of the subject.Nov 30, 2008 at 8:04 pm #65875txbluegill
MemberI’ve never used the macro mode on the E510 and I assume it works like your E500.
Dec 1, 2008 at 4:02 am #65876Neal Osborn
MemberMike – a few additional comments and examples.
Shooting flies in the vise is difficult. Lots of technical stuff going on while at the same time trying to get a simple clean shot of the subject to either teach others or to show minute detail.
Background – there are two solutions. The simple method is to forget it altogether and just shoot the fly to educate others or create discussion. The more difficult method is to incorporate a background but again you have to deal with flash and shadows. If you are just starting out this can get frustrating in a hurry.
You can focus in on the fly and take pictures of tying steps – instructional, not artsy.
Or you can add a background. Here are a few shots with a simple background about 12″ from the fly. Notice the shadows and halos, not great shots but they get the job done.
Then you can direct your flash to cast the shadow below the subject and then crop out the subject. However, the problem with cropping is that you end up with different dimensions on your final pictures and they lack uniformity. Notice how much smaller this second picture is compared to the one above.
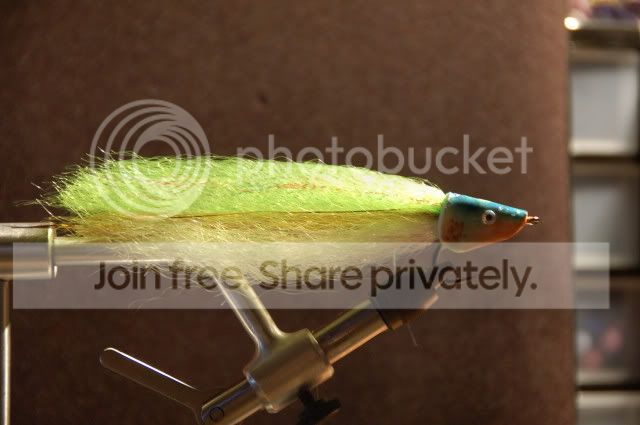
Be careful when using a hot lamp! It is tempting to put the desk lamp on the subject to light up the fly but you will likely get a big bright glare as shown below.
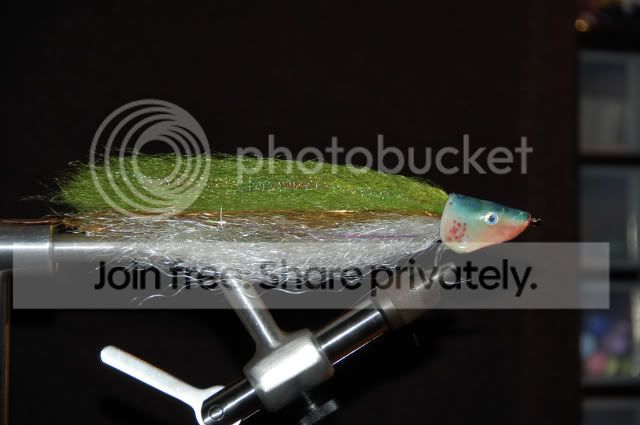
Instead, stick with the flash, it will work with your camera and create a more natural exposure as shown below.
Here is a shot of large fly with a hot lamp and brown background and then the same shot using flash and a black background. Little technical steps like this can greatly improve your shots.
The above pictures all employ on-camera flash and auto settings. Here is a fly with a blue background, the difference here is that I used flash off-camera and directed a dedicated flash toward the background. Thus the nice blue background shows up well with no shadows. If you don’t have the capability of off-camera flash then just shine a hot light on the background.
To get artsy shots you need creative lighting and off-camera flash, period. However, such technology requires an investment and a whole new learning curve. The players include a good DLSR camera, a macro lens, off-camera slave flash, snoots, reflectors, etc.
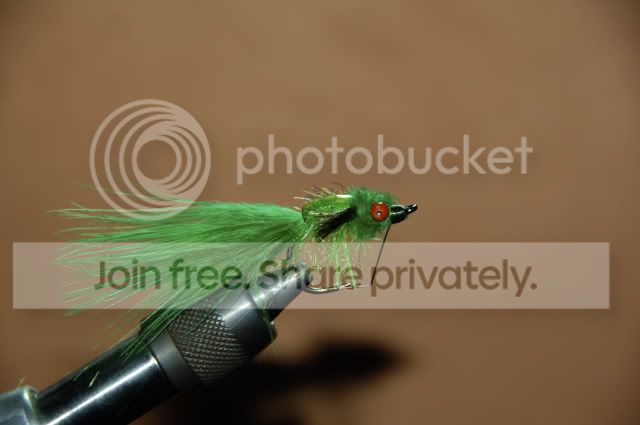
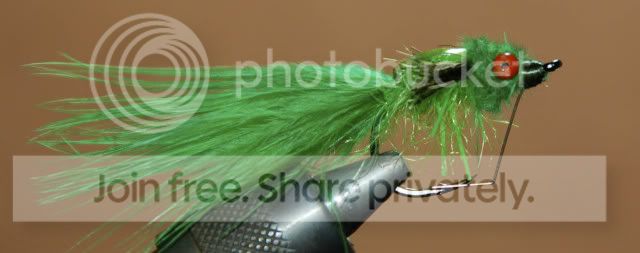
Here you can see a direct beam on the head of the black fly. The following picture is the final shot and you notice the head is lit up and the green background (which is 6 feet away) is separately lit by a second flash.
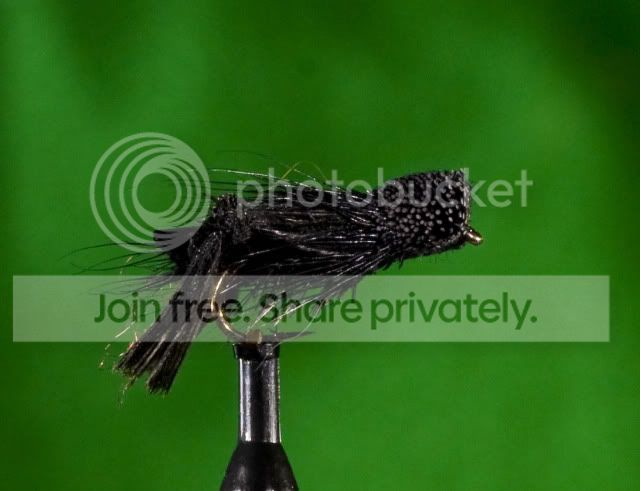
Putting it all together. Like the Master Card commercials say at the end . . . Priceless. (note: took me about two years to be able to get shots like this; still learning).
 Dec 1, 2008 at 6:13 am #65877Mike McKeownMember
Neal, hows that book coming along???
Thanks guys getting it, slowly…
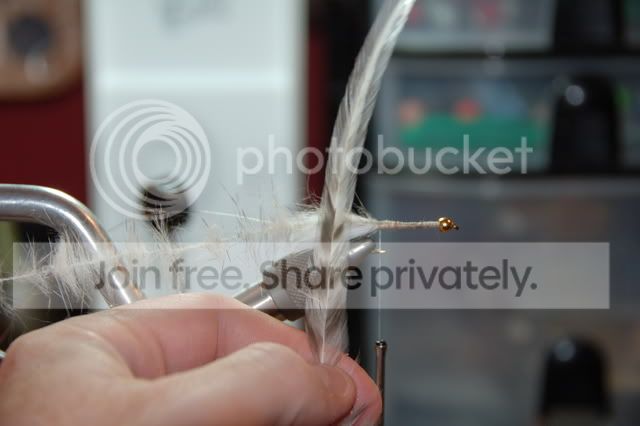
Here’s where I am…
Tied it one size bigger.
Did a trial run – F16 on A priority, flash 1 whole point down, 2 additional lights. but it came out a little dark.
did the second run with the flash at “normal” and it cam out OK.
Still needed to PS the pics to get the best out of them.I will use what I got, but I think I need more light, so off to get a 20w energy saver.
Not enough light from the bottom, going to add foil to the bottom of the “light box”.Also going to add more light from the front sides, like Neal’s example…
More to come…
But what I can say. It is the same as the On Stream Macro thread, the trick is understanding the camera, the lighing and the subject. keep it simple and, I have learnt, make notes as you go, so when you make a chenge you rmember the settings and can mark what you changed…
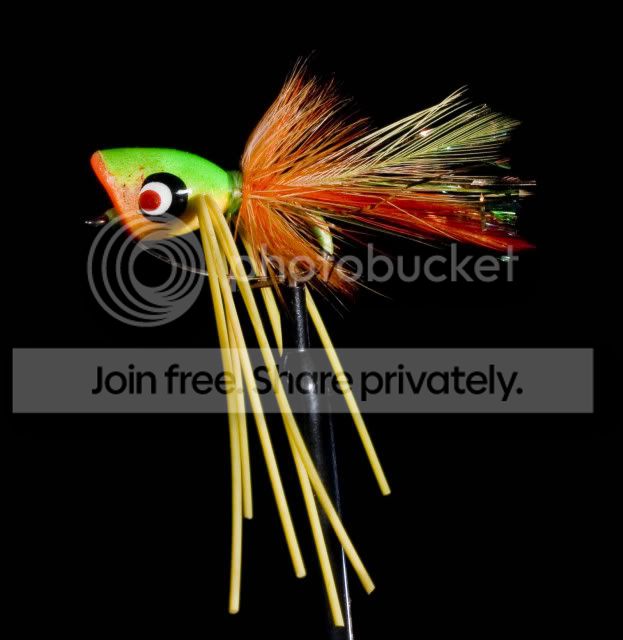
Loving it. Here a pic…
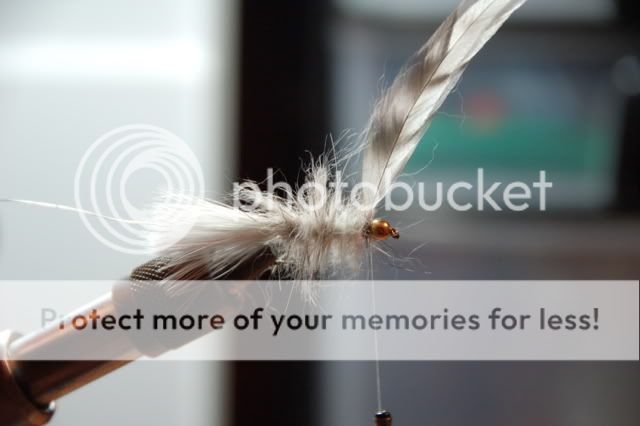
Dec 1, 2008 at 7:25 am #65878MemberThat’s looking good Mike. You are certainly talking the talk and walking the walk.
One little nit picky thing – your copyright and logo watermarks are bit bold and bright. They both grabbed my attention before the fly. You might want to decrease their size or decrease the opacity.
Dec 1, 2008 at 9:19 am #65879Mike McKeownMemberThanks Neal, I will. At this stage that is is a tester…
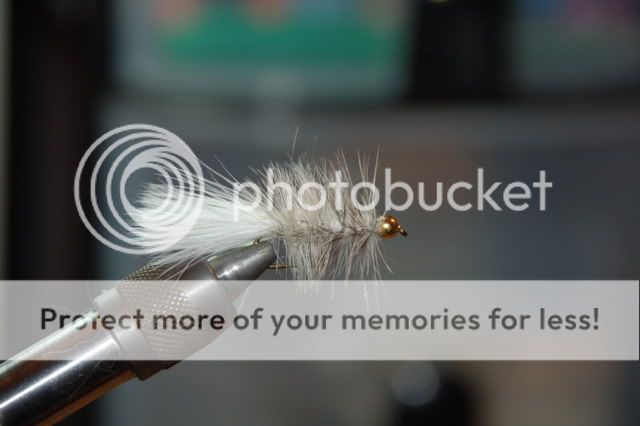
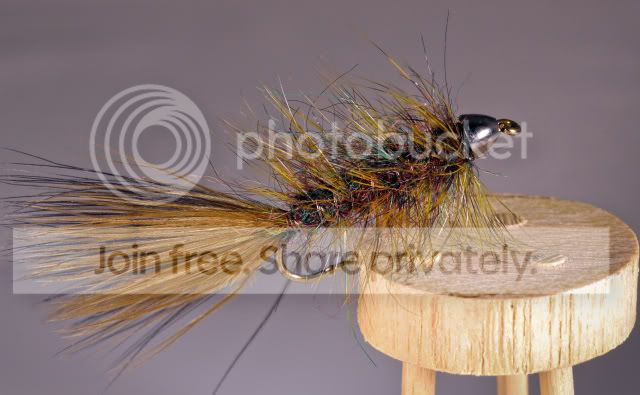
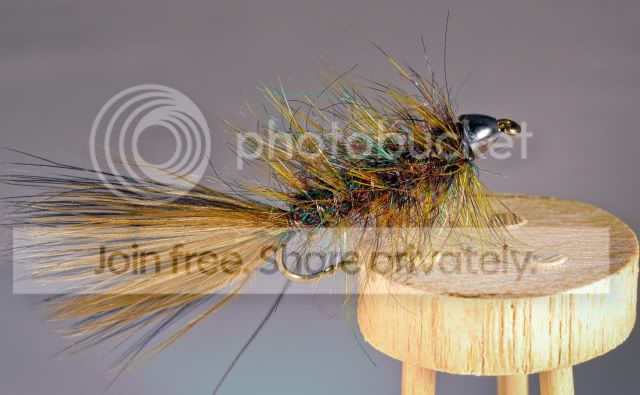
Here is one of Shaun, the back kicker… the final pick in his step by step…

Much less logo and stuff, pretty good pic. I did that for those pics, that is what it will finally look like.
Neal, if you get a chance, I would really appreciate your comments on how I have laid out the Step By Step.
Dec 1, 2008 at 9:34 pm #65880john michael white
MemberPretty cool Neal!
Dec 2, 2008 at 3:57 am #65881MemberMike, your step-by-step looks pretty good. I always hesitate offering advice on others pictures since I am still on the learning curve myself. Keep asking what you would improve and each set will be better than the prior.
That being said, I did notice something in your pictures worth comment – white balance and hue/saturation. I mention this because that has been a weak spot in my own technical learning curve and it is very important with pictures of flies. Believe me, this is one of those “Oh my God” areas where when the lightbulb turns on you won’t believe the improvement in picture quality. Basically, it is the art of making the colors of your tying material and final subject look real in respect to color. Having spent much time and effort on on the other aspects of macro photography, it still amazes me how important the final simple colors are to the picture. IMO this skill is best learned best by trial and error and lots (and lots) of photoshop post work with curves, hue, saturation, white balance. Also, here is where all that RAW vs jpeg and color space discussion come in to play (lots of discussion on these topics for a reason, they are basic requirements to getting the final picture color to look like the real color).
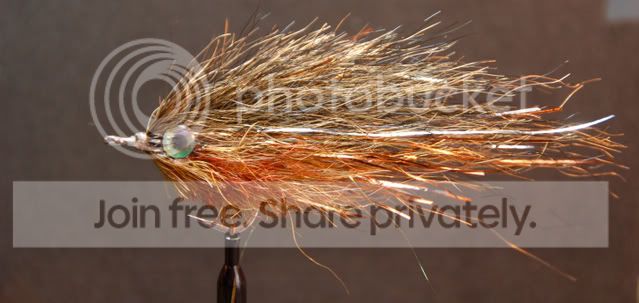
I can’t end without an example. 😀
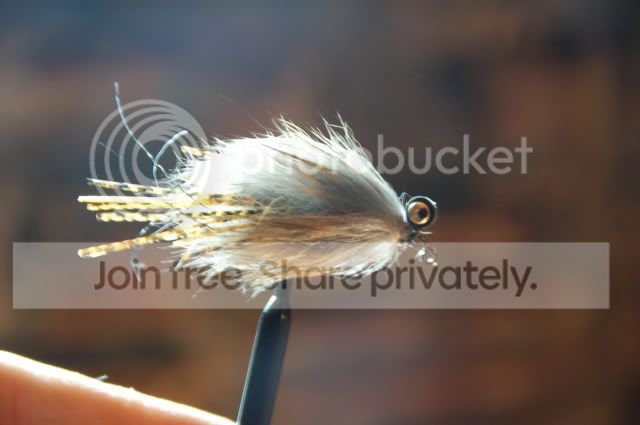
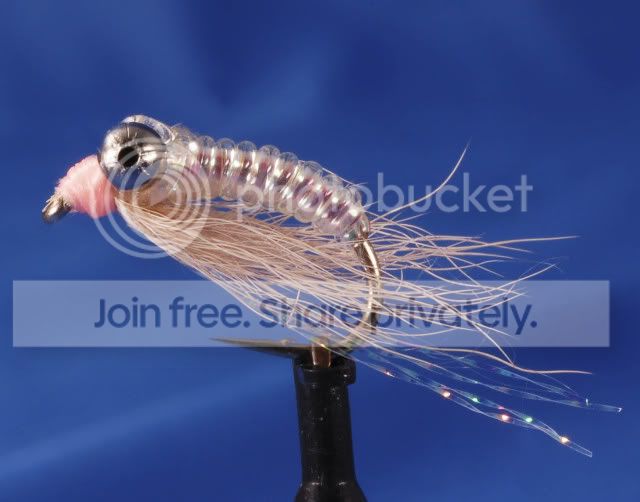
Here is a shot I worked on for a very long time (but wasn’t able to get that single black hackle from hanging down, aagghh). This is a rainbow wooly bugger and I wanted to show the colors of the dubbing loop and highlight how important they are to the finished product. I shot all the pictures in RAW.
Look closely at the first picture. I was happy with the depth-of-field, composition, clarity, and the background was sufficiently far away and there was no spill of light (a bit bright on the wood but overall not bad). However, I forgot something very important – I didn’t switch the camera to manual white balance and therefore the auto metering was employed. Thus the final image has a lot of magenta and the colors, although vibrant and saturated, are clearly off. This off-color shot leaves the viewer a bit strained.
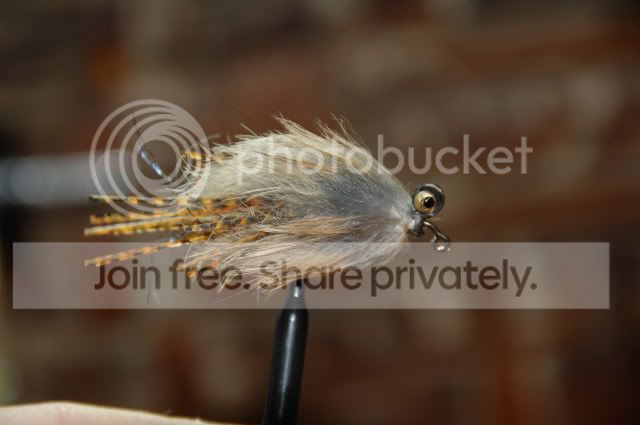
The solution is to reset the white balance (that is why shooting in RAW is so important because you can salvage in post production). I set a manual white balance that matched the flash. Then I selectively changed each of colors until I got the correct image (actually it still looks a bit green to me but then again I’ve looked at this picture so much I can’t remember the original, ha). Notice how this second image is cleaner and much more simple, basically easier on the eyes. Your attention is drawn to the fly and the dubbing. Now your viewer can walk right in to the picture and feel at home.
 Dec 2, 2008 at 6:18 am #65882Mike McKeownMember
Neal, you are my hero….
Thanks, I will now set up a white balance tester for my light box, then set it correctly. Then I will shoot in RAW, and do the correct exposures and the likes…
OMG, learning – learning – learning…
On the SBS, what did you think of the web lay out, withe tabs, instead of scrolling???
Dec 2, 2008 at 7:08 am #65883shaun futter
MemberHey guys! Mike said I should pop in on this thread, so here I am!
Dec 14, 2008 at 8:59 pm #65884Mike McKeownMemberOk, just to update you guys on where I am in this process.
Although I seem to have some issues with the auto focus when I shoot in RAW, I posted these pics.
1. -
AuthorPosts
- You must be logged in to reply to this topic.